Welcome Back!
We have lots to cover in our lesson today. Stamping is a great way to embellish your memory planner pages. They are versatile, reusable, and compact, making them a great addition to your crafty toolbox.
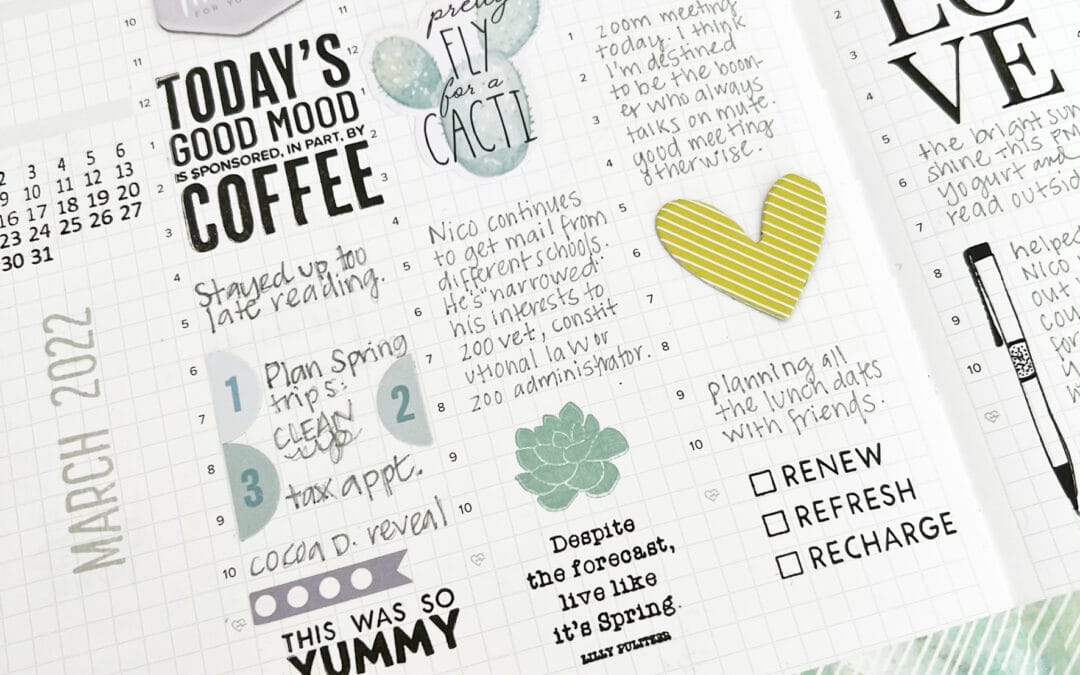
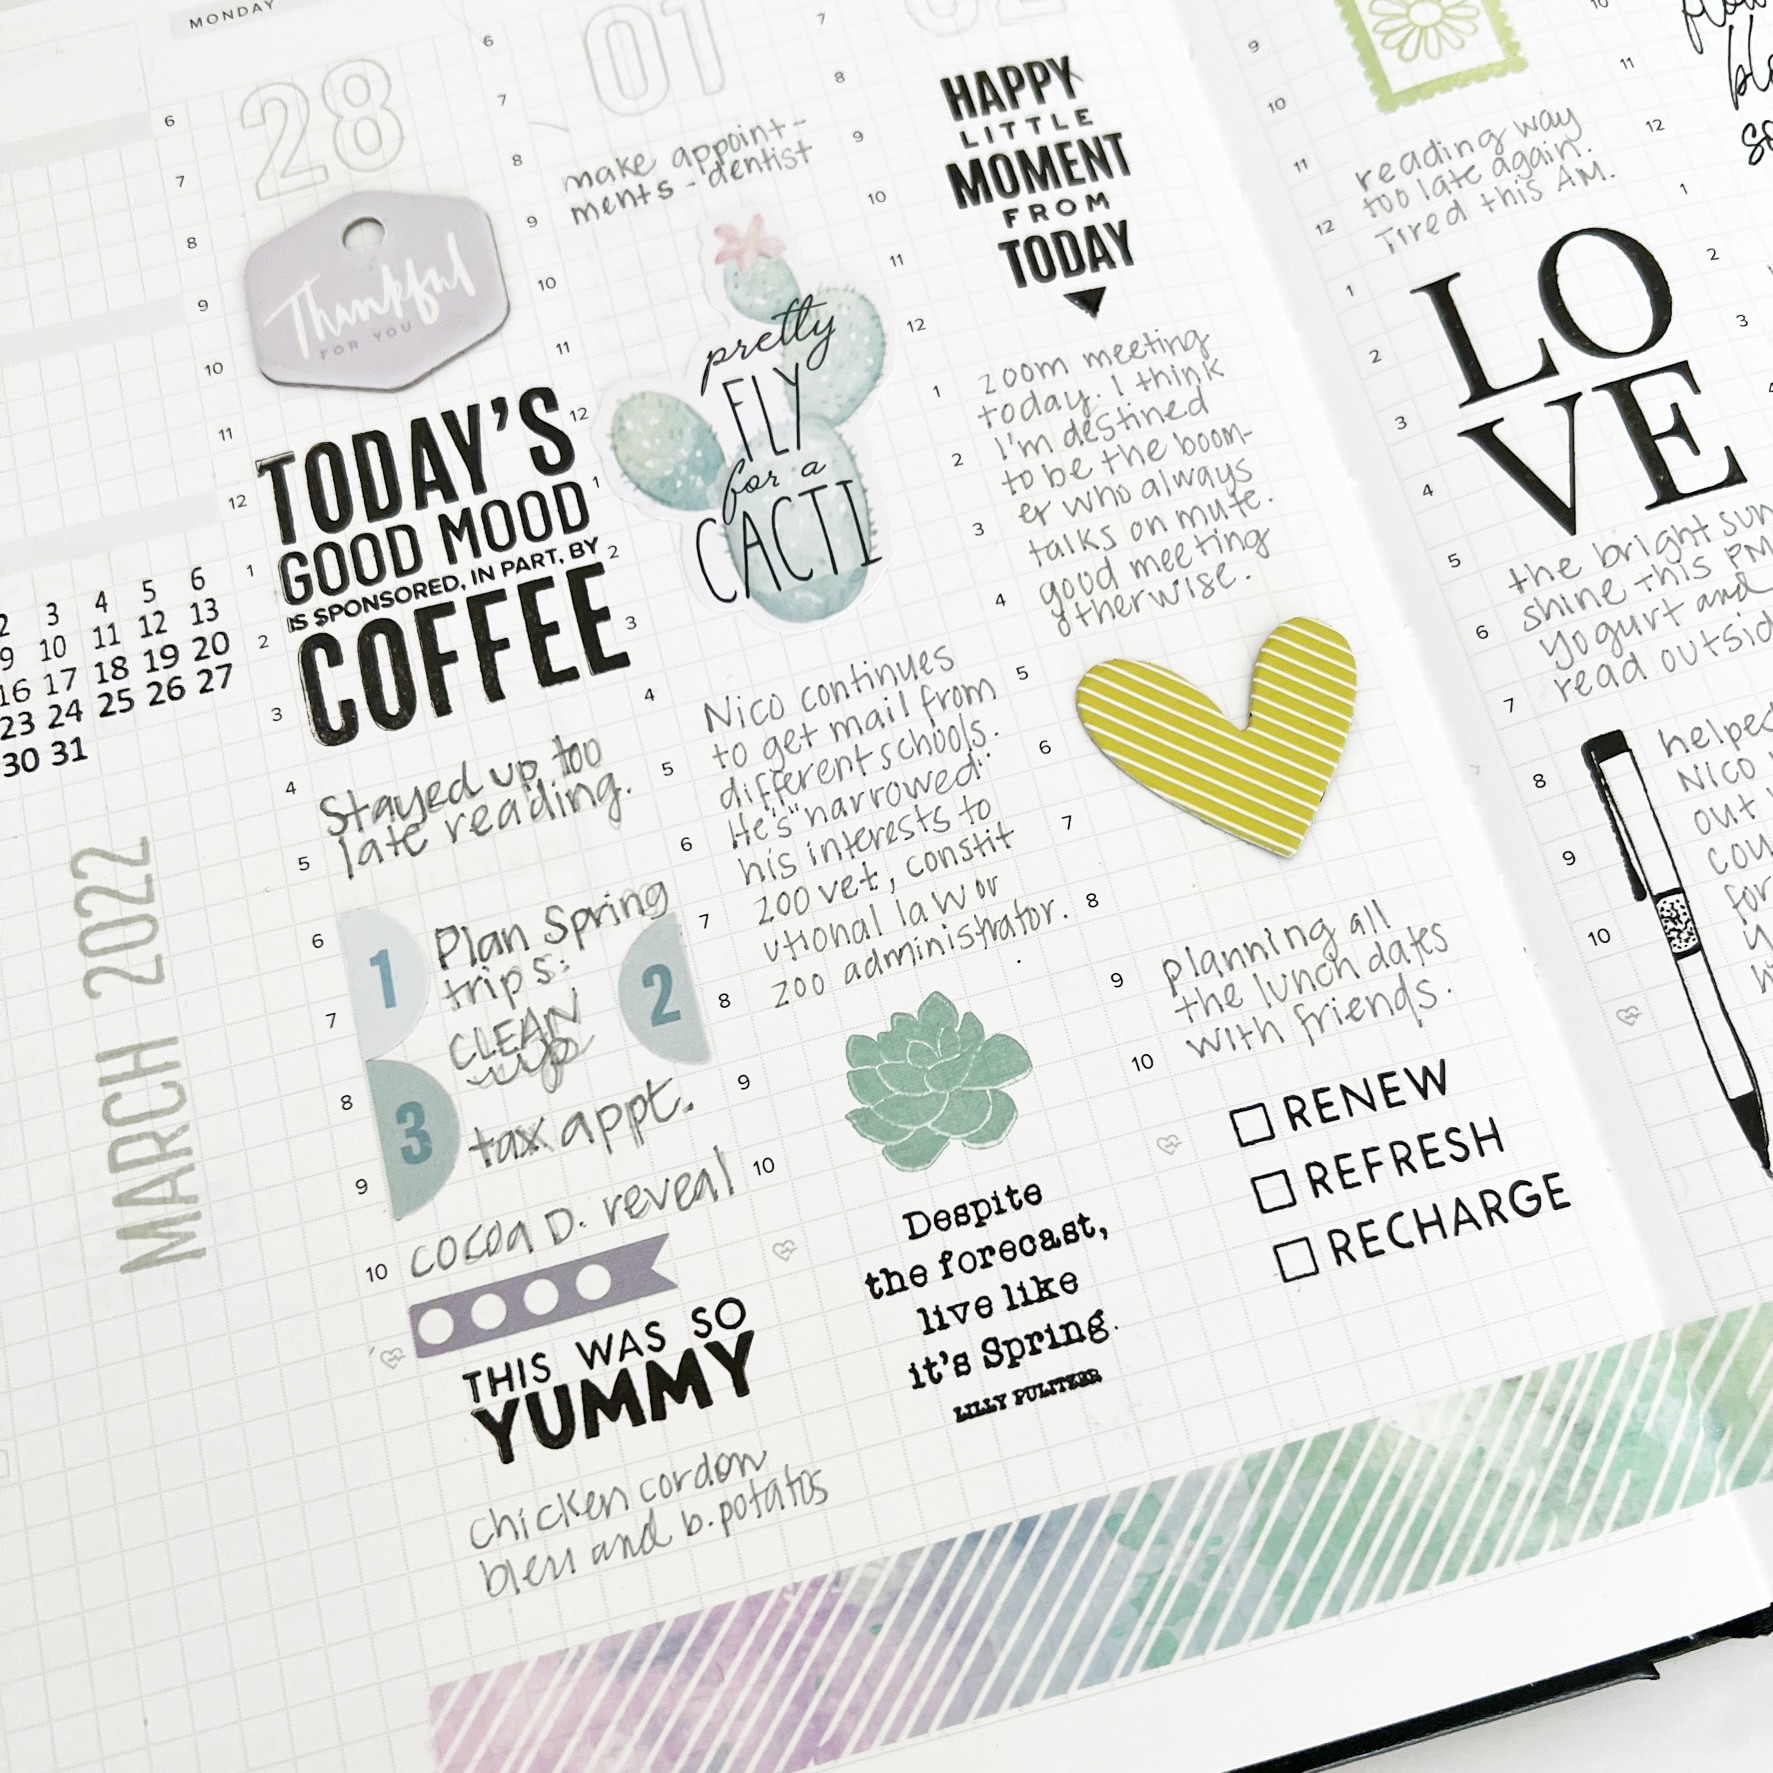
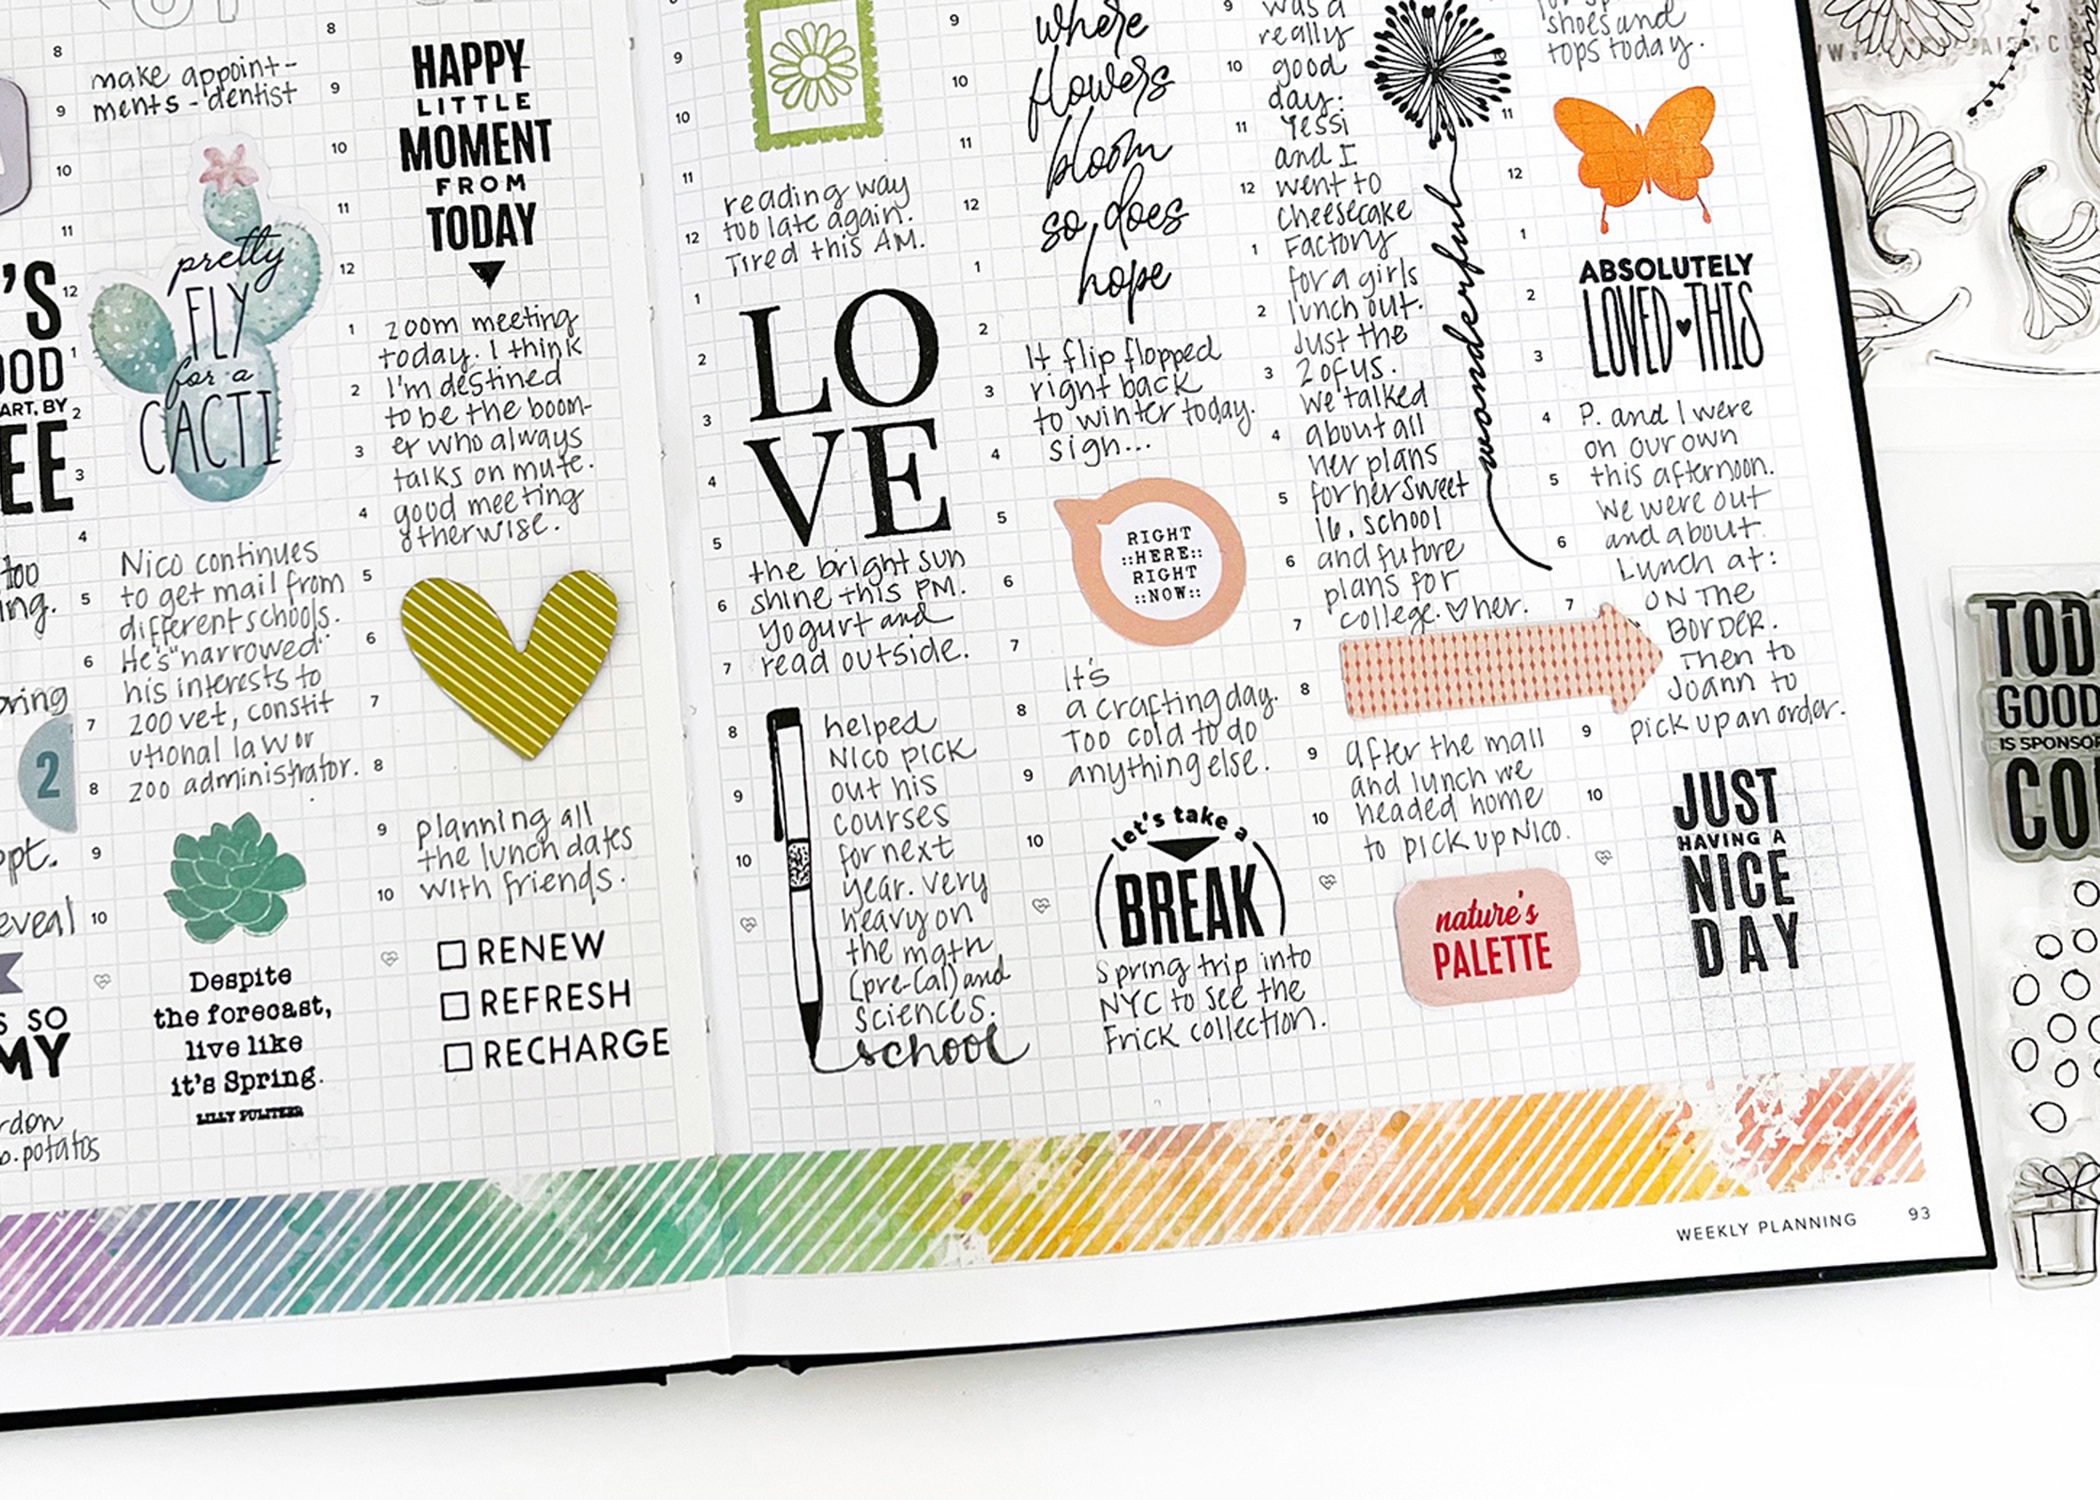
Nancy Damiano: Stamping in a No Photo Memory Planner
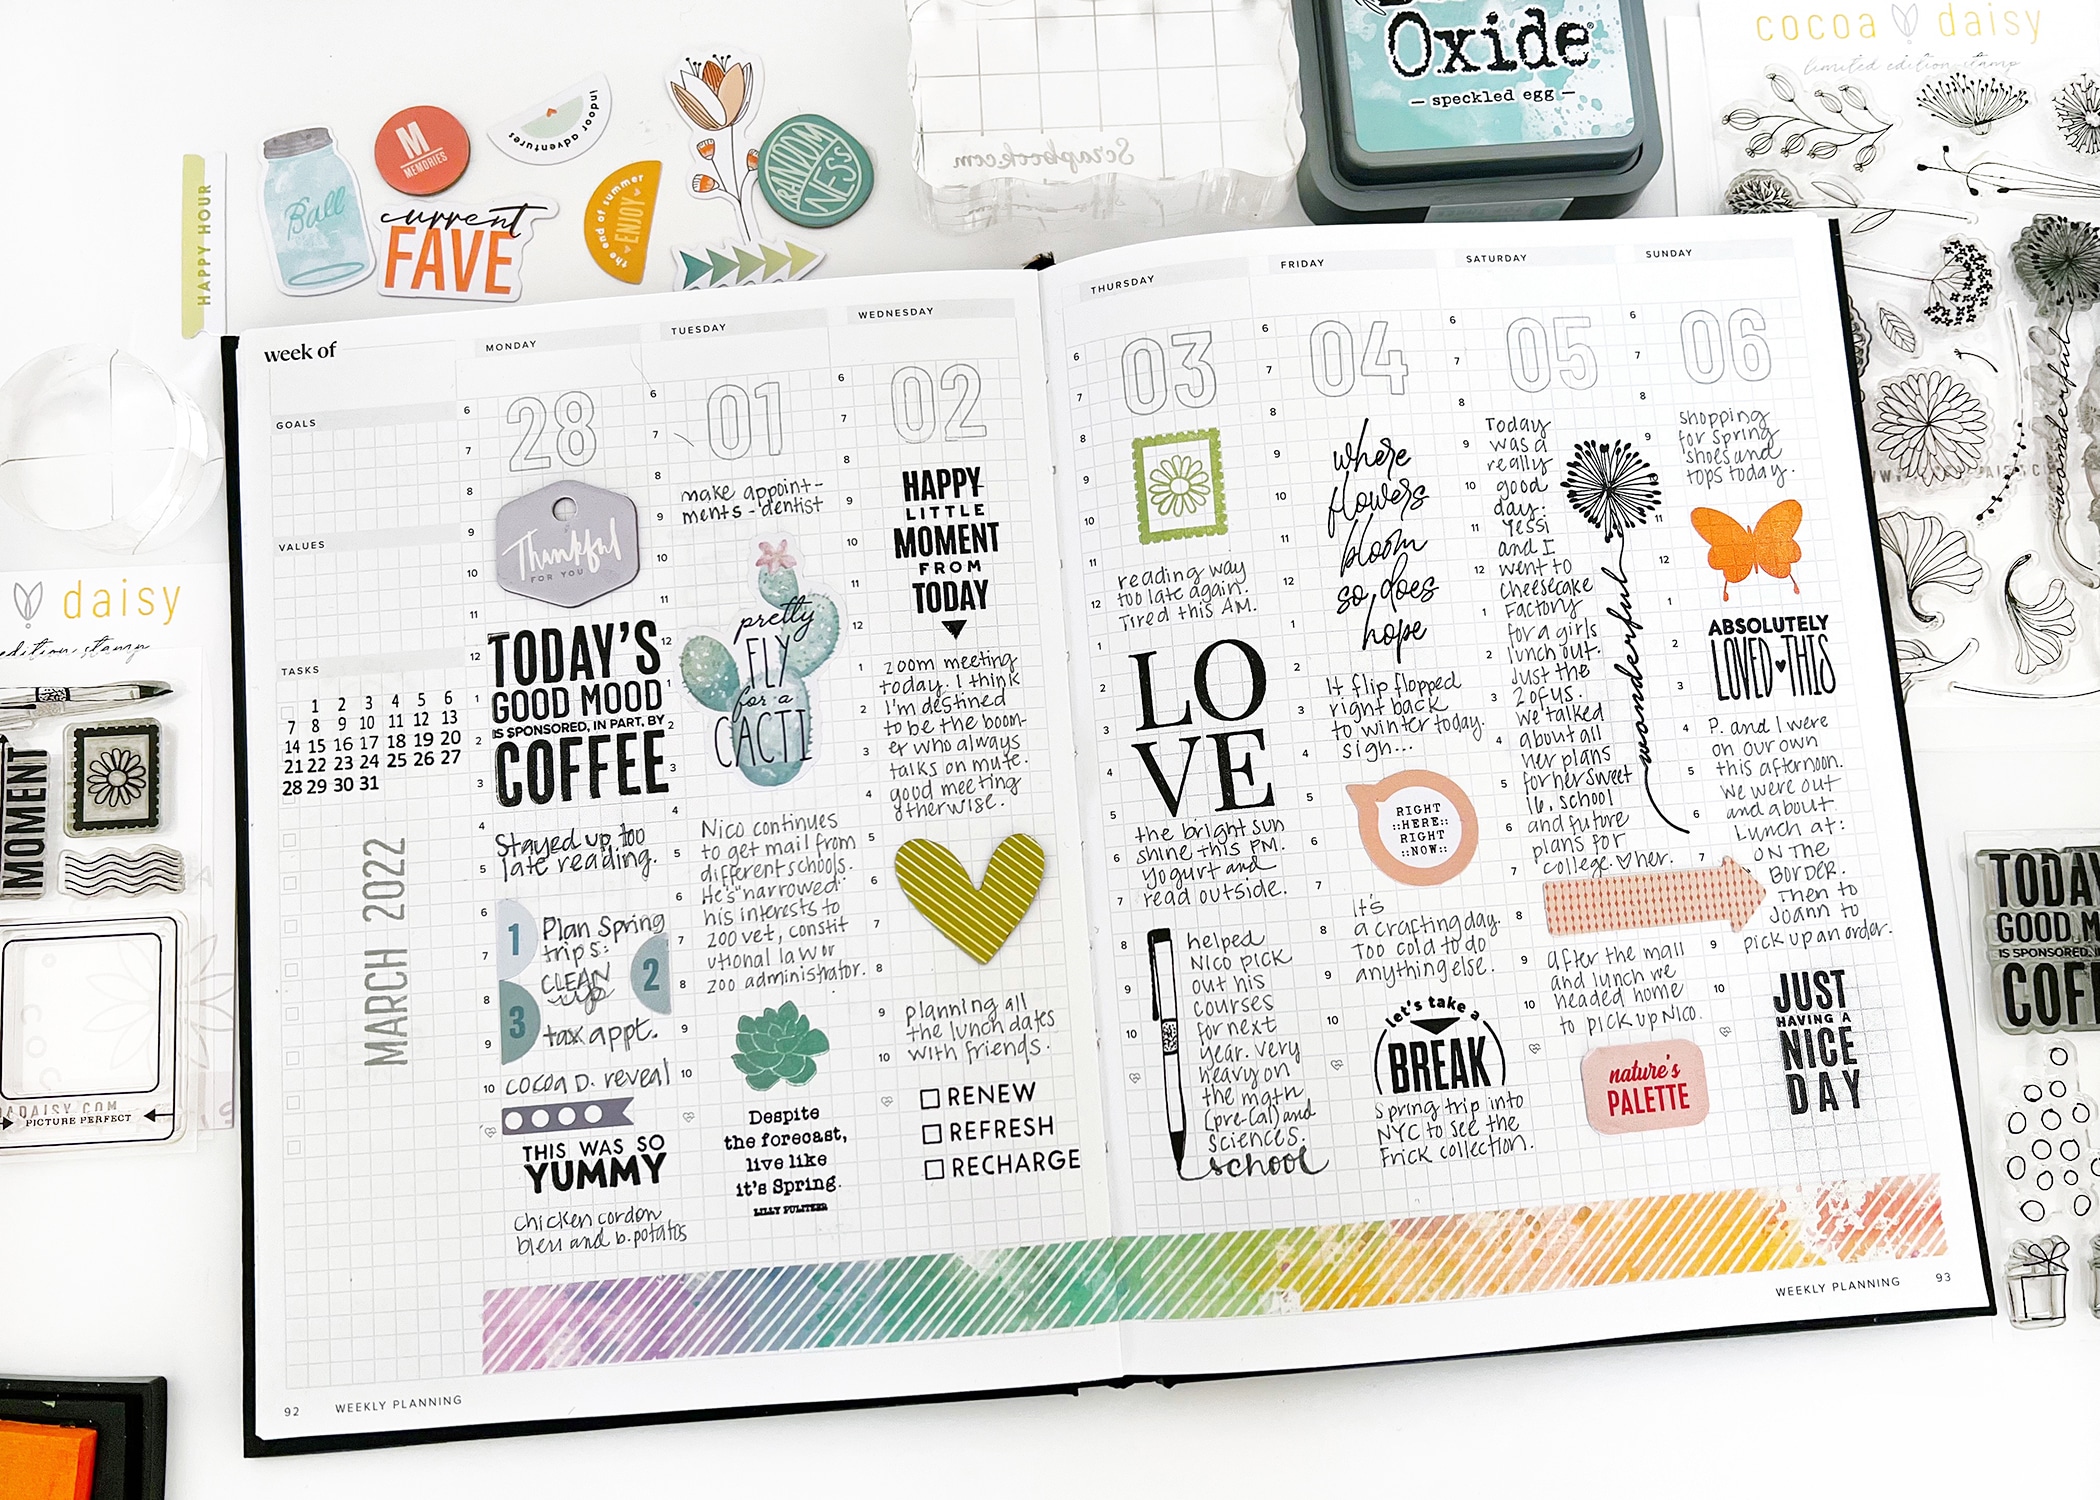
Let’s dive into a creative project that is part reflection journal, part art therapy, and a whole lot of fun! I started this project by repurposing an undated planner that I had on hand. While I work in a horizontal orientation with columns, you can apply all of the techniques to any planner. I wanted to accomplish two things when I started this memory-keeping project.
- To use my stamps and bits and pieces leftover from kits in a meaningful way.
- To have a creative practice that I could accomplish weekly in a short, stress-free way
Here are the supplies I used for memory planning:
- Hemlock & Oak undated planner
- Stamps
- Die cuts and Stickers
- Washi tape
- Stamping ink
- UNIPIN Fineliner pen in Light Gray 0.1 or your favorite writing pen
- Adhesive
To start this project, you need content. Get into the habit of jotting down 3 to 4 things each day. You can use your current planner or have a separate notebook to gather your thoughts.
What Do I Write About?
You can take some things directly from your daily planner. Here are a few more ideas to get you started:
- appointments and to-do’s
- what’s in the news (local or national)
- outfit of the day
- quotes or nuggets of wisdom
- what are you feeling today?
- weather and how it affected your day
- things that made you smile, laugh or cry
- lists
- wins and losses
- what are you reading, watching, feeling, eating, or looking forward to?
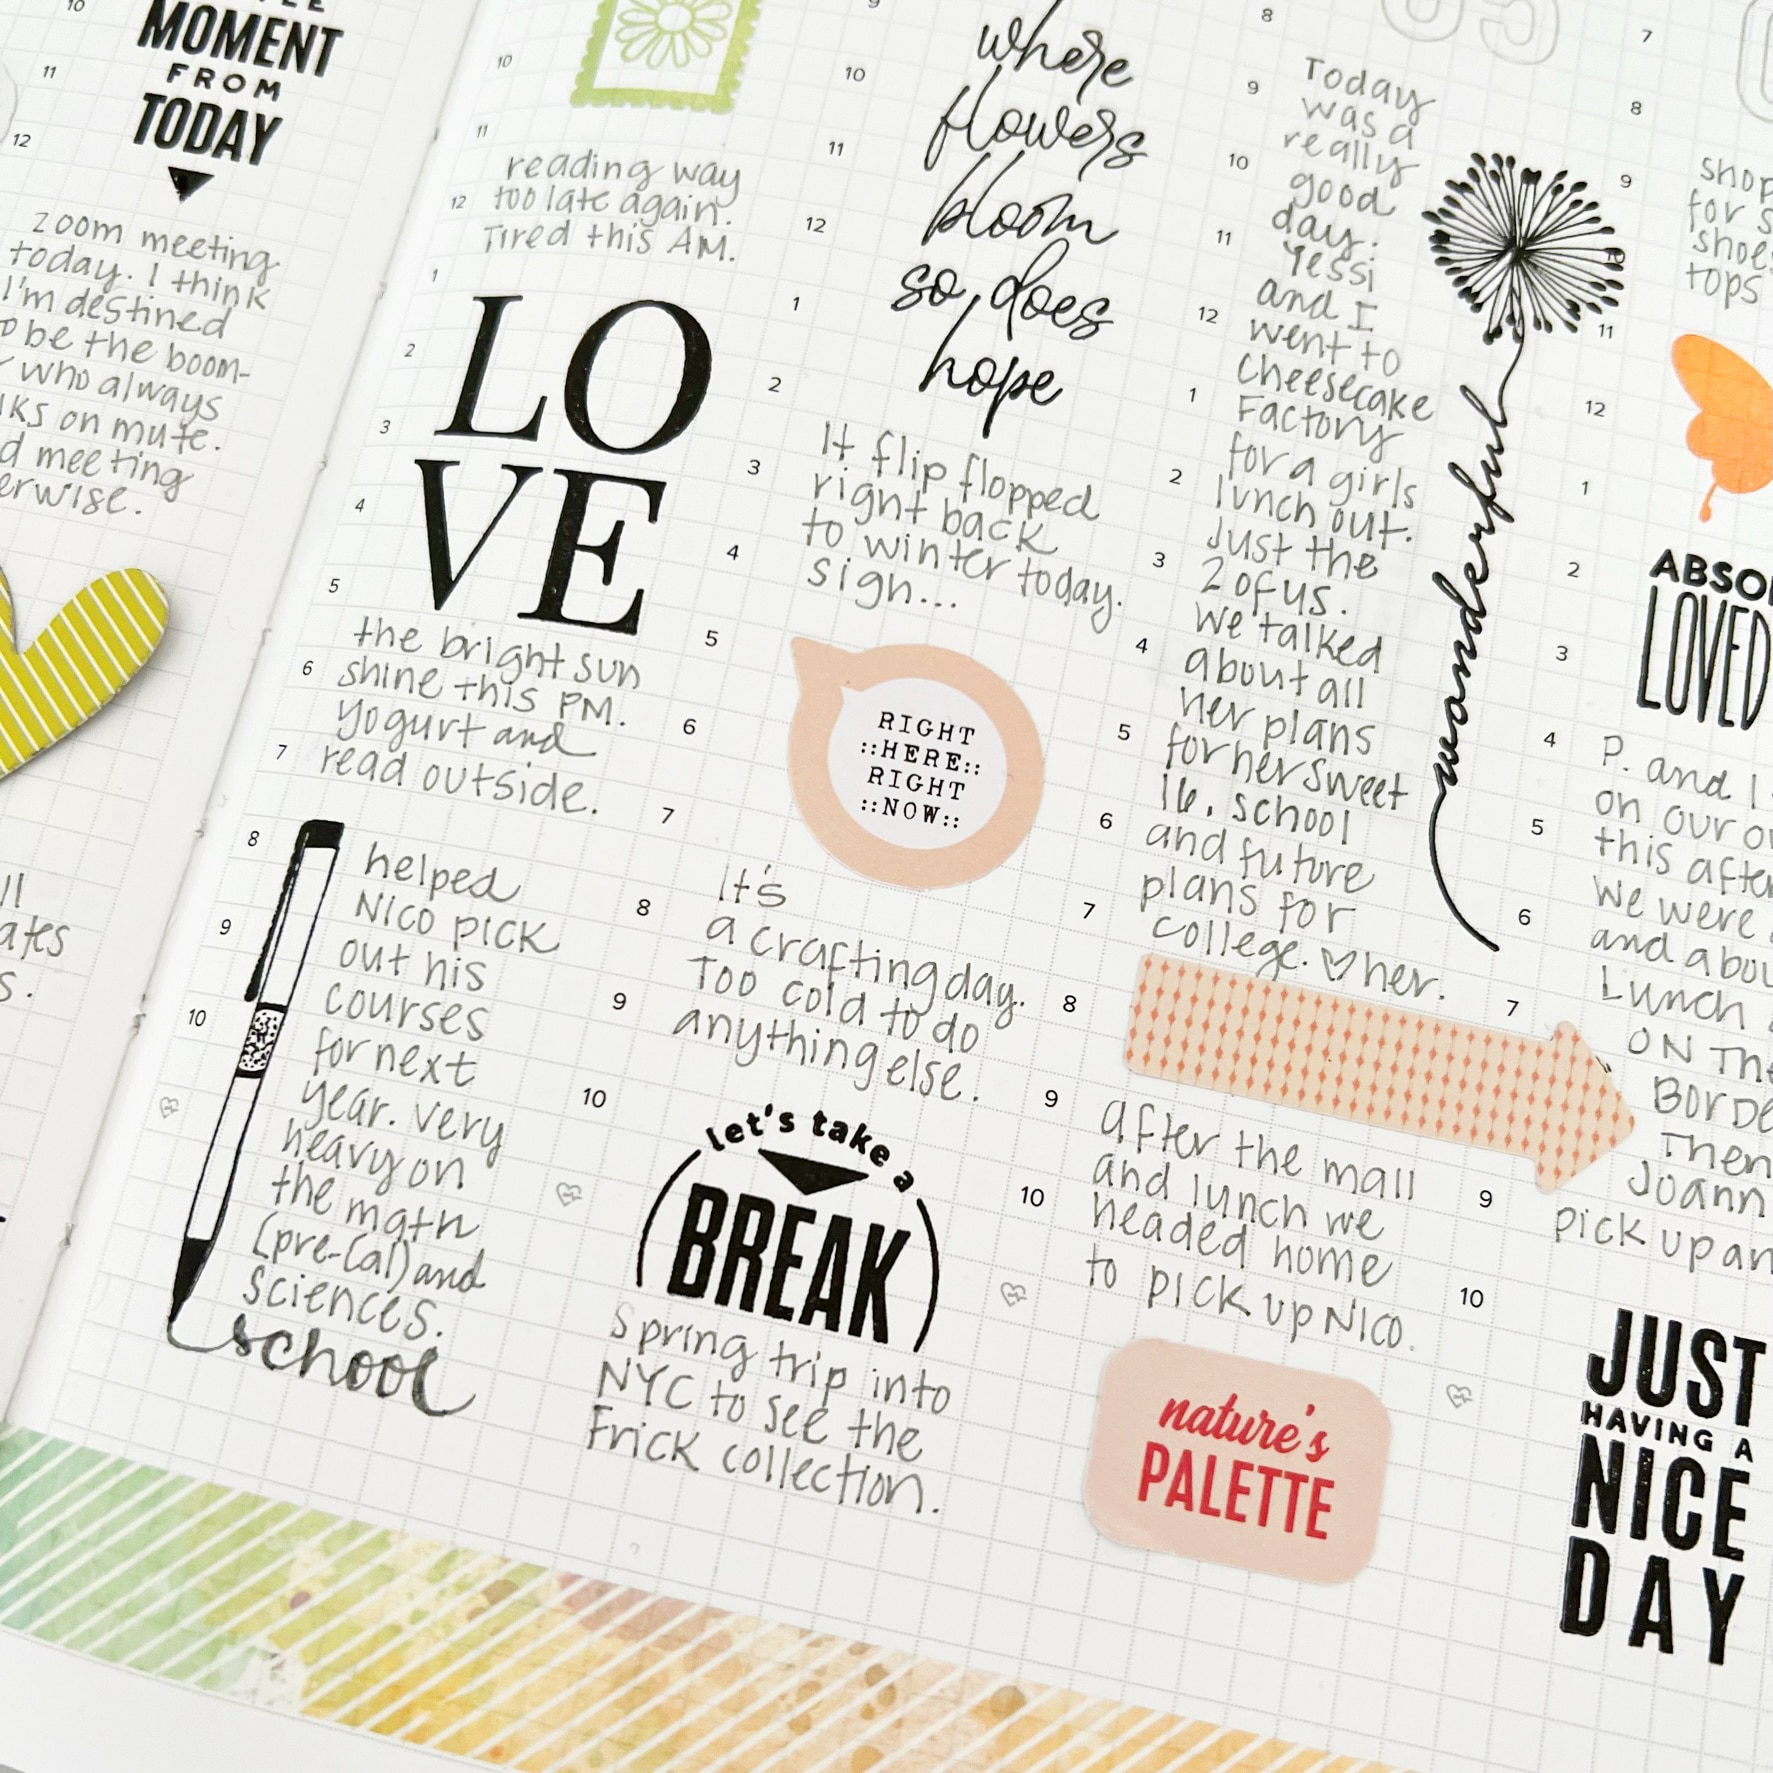
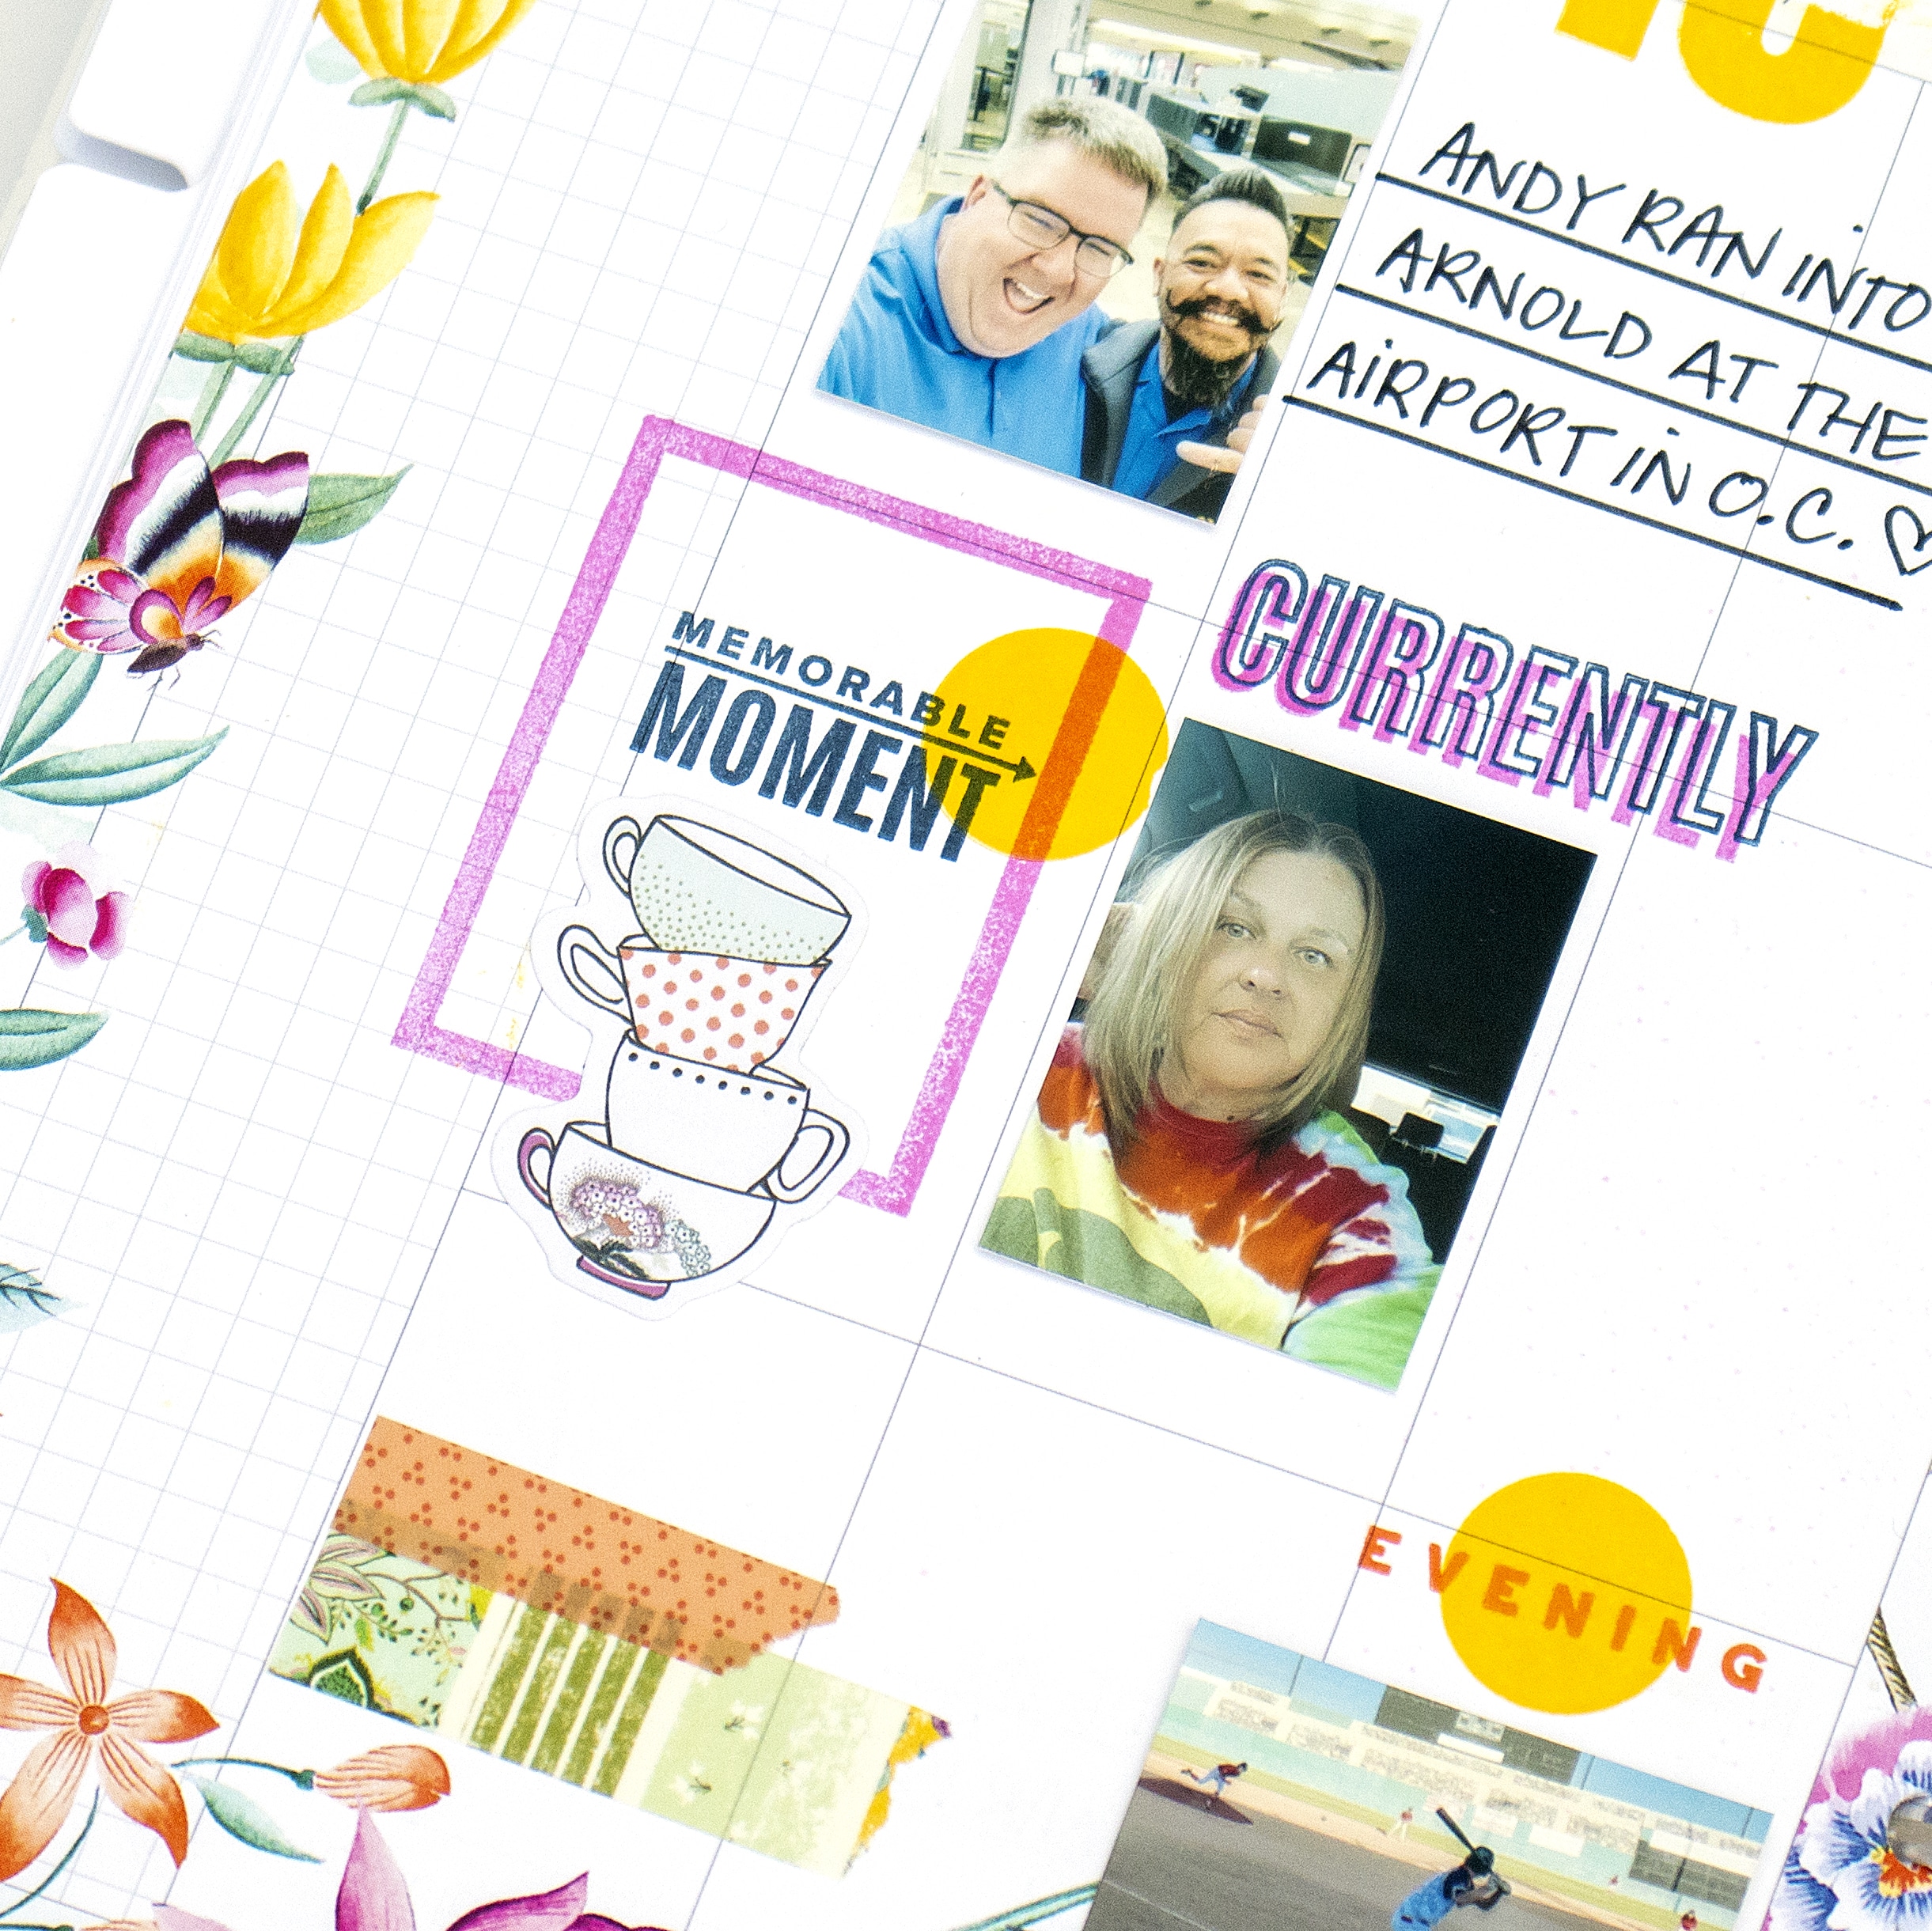
Next, start by jotting down stories, using a nice bold stamp and some stickers to document your first day. When moving from column to column, make sure that the bold stamped sentiments and writing are varied throughout the page. You don’t want two bold images to appear side by side. Keep your focal points balanced.
Repeat the same technique until you have filled up the entire week. Try to look at the layout as one whole rather than 7 separate columns when choosing stamps or die cuts.
Let’s Talk Ink
Choosing stamping inks that work well in this project is key. My favorites are either chalk ink or pigment inks. These types of inks do not bleed through pages and come in a variety of colors. The downside is they take a while to dry and can smudge. Leave your book open overnight or hit it lightly with a heat gun to set. Distress Oxides are a hybrid that also doesn’t bleed through pages and is a bit more smudge-proof. For stamping in black, I love the crisp lines that I get with Versafine Ink. I find that Archival Ink and most dye-based ink bleed through pages and so I avoid them. A memory-keeping planner is a great way to start a creative art practice and at the same time use up some of your favorite supplies. Nothing feels better than that! If you have questions or just want to connect, you can find me on Instagram @nancydamiano. Happy crafting!
Jennie McGarvey: Stamping with Classic Size Inserts
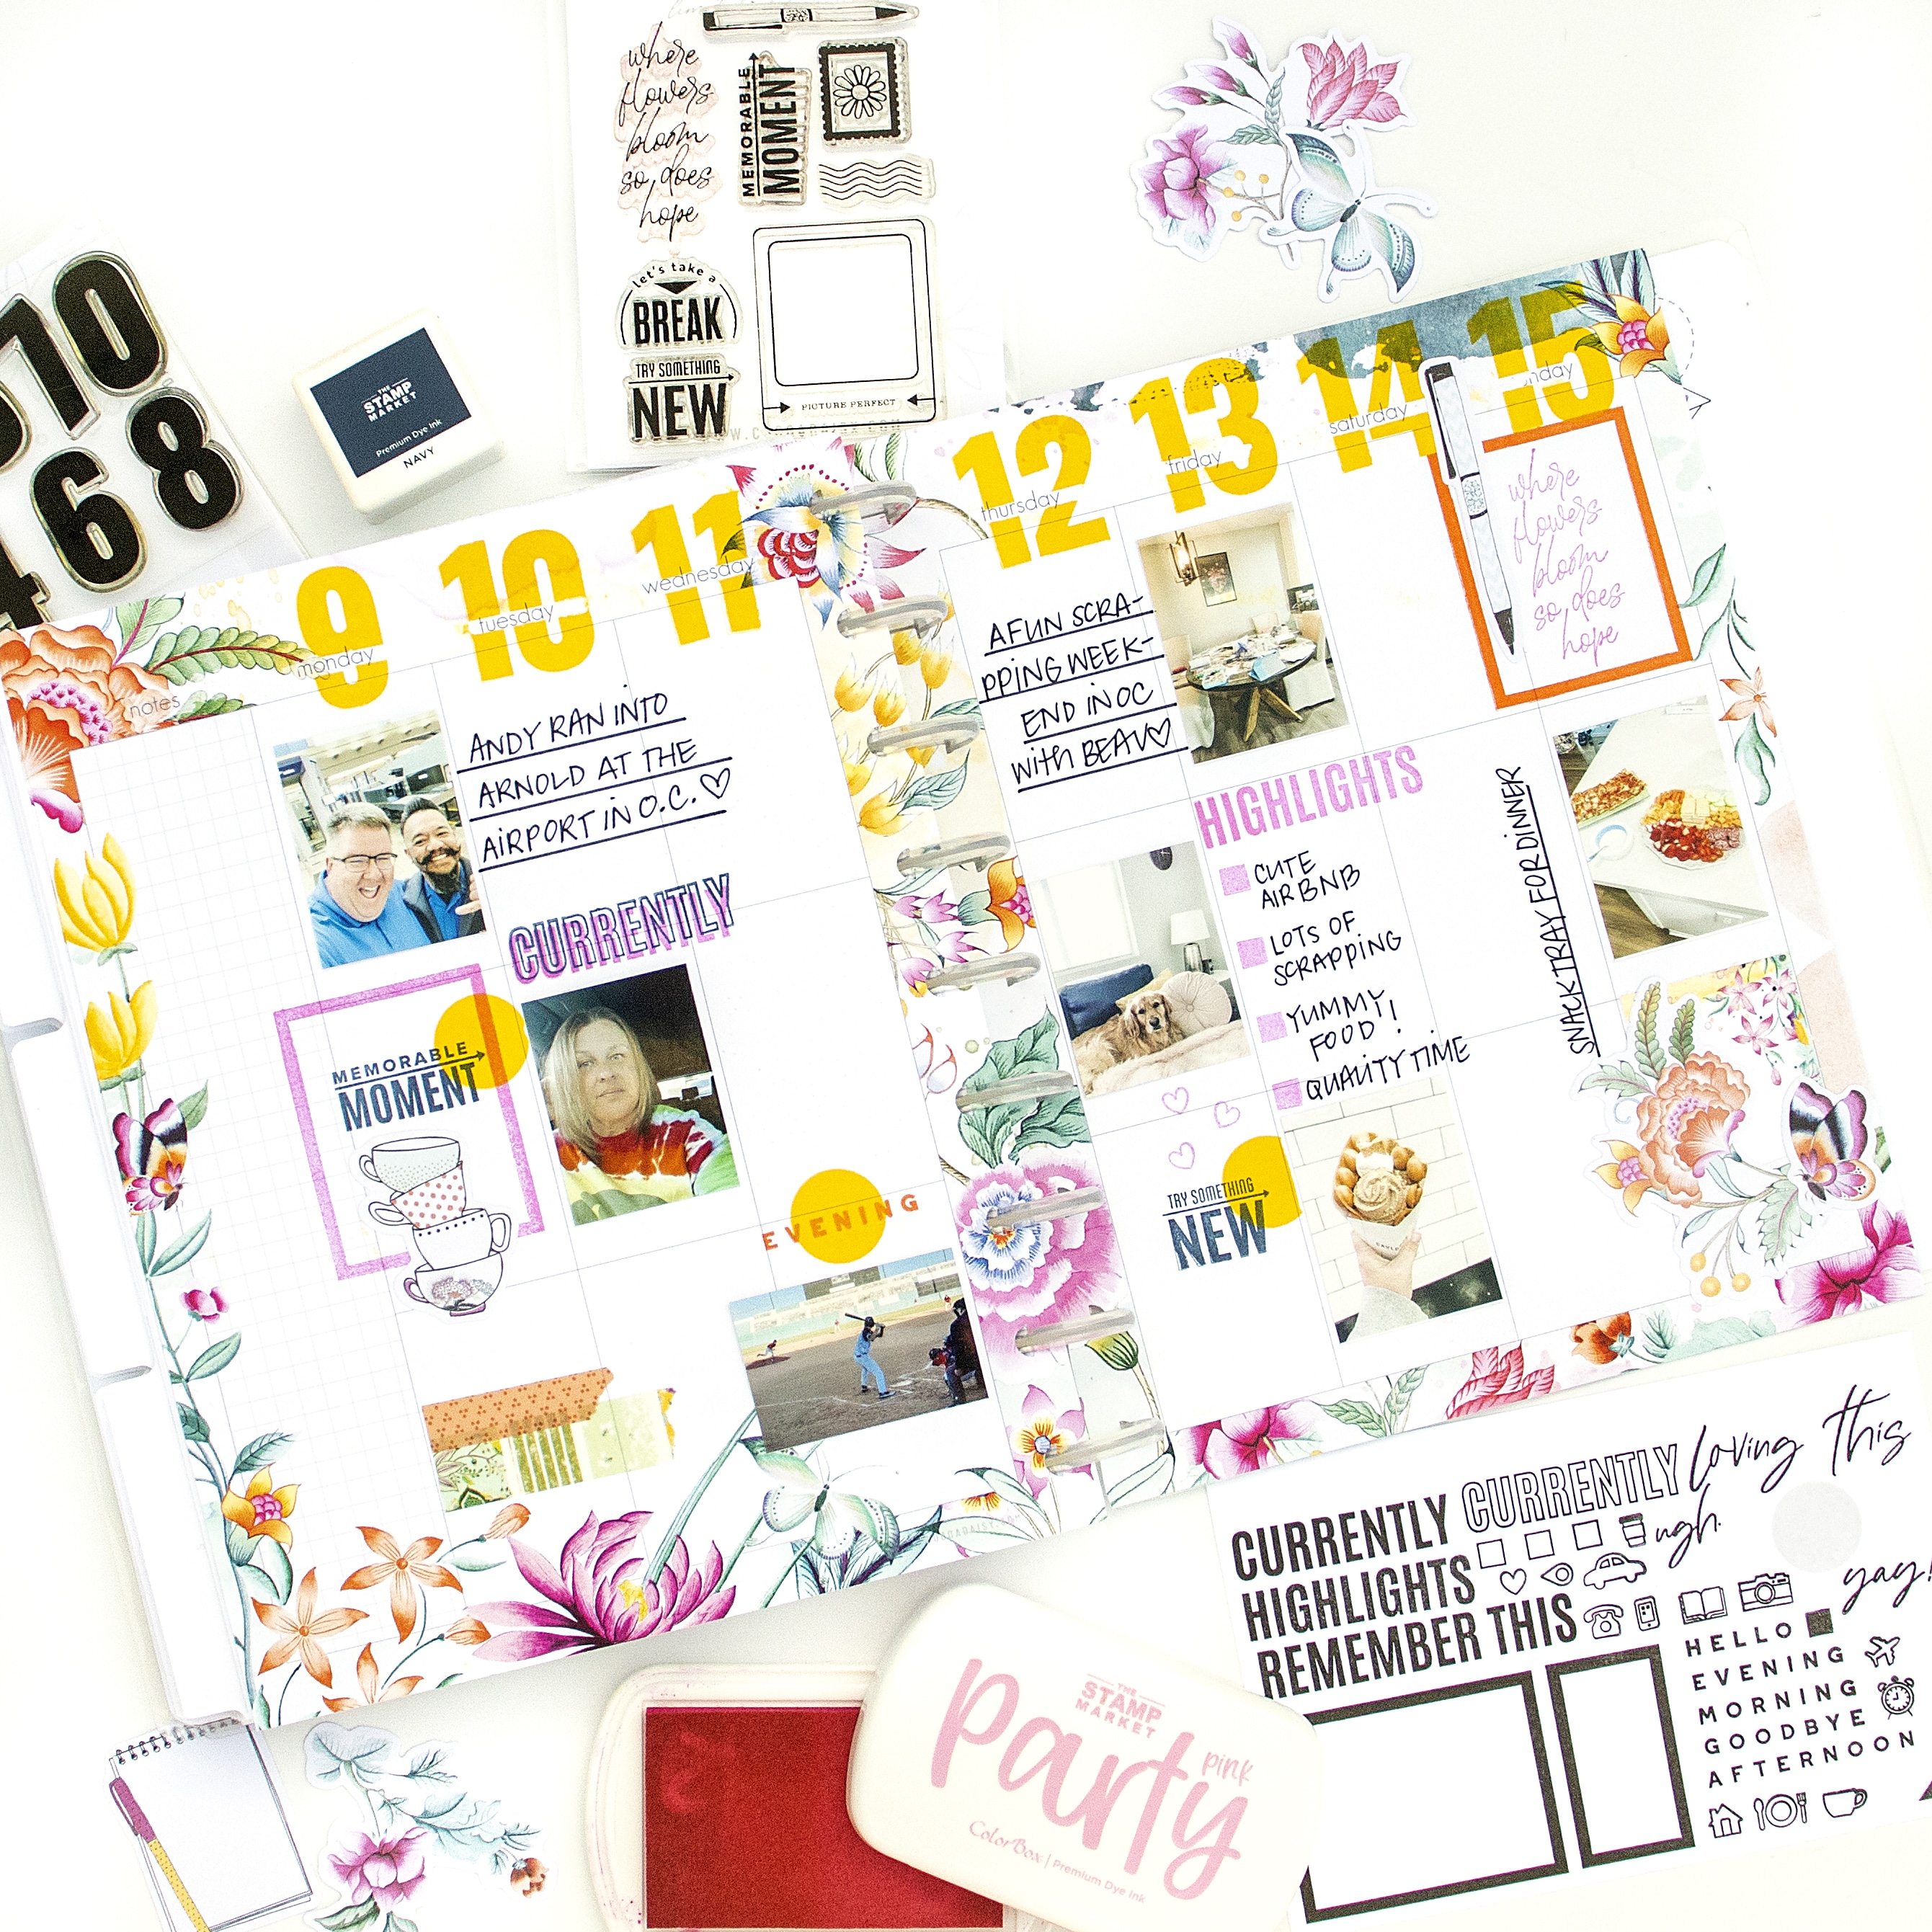
Rachel Newman: Currently and Highlights Page in a Daisy Dori
I am sharing two tutorials using stamps on the blank pages of the Daisy Dori Insert. In this example, I am using the A5 Daisy Dori, but you could do a similar thing in most of the other Dori Sizes. This would also be possible to do between the weeks in the ring-bound inserts, too.
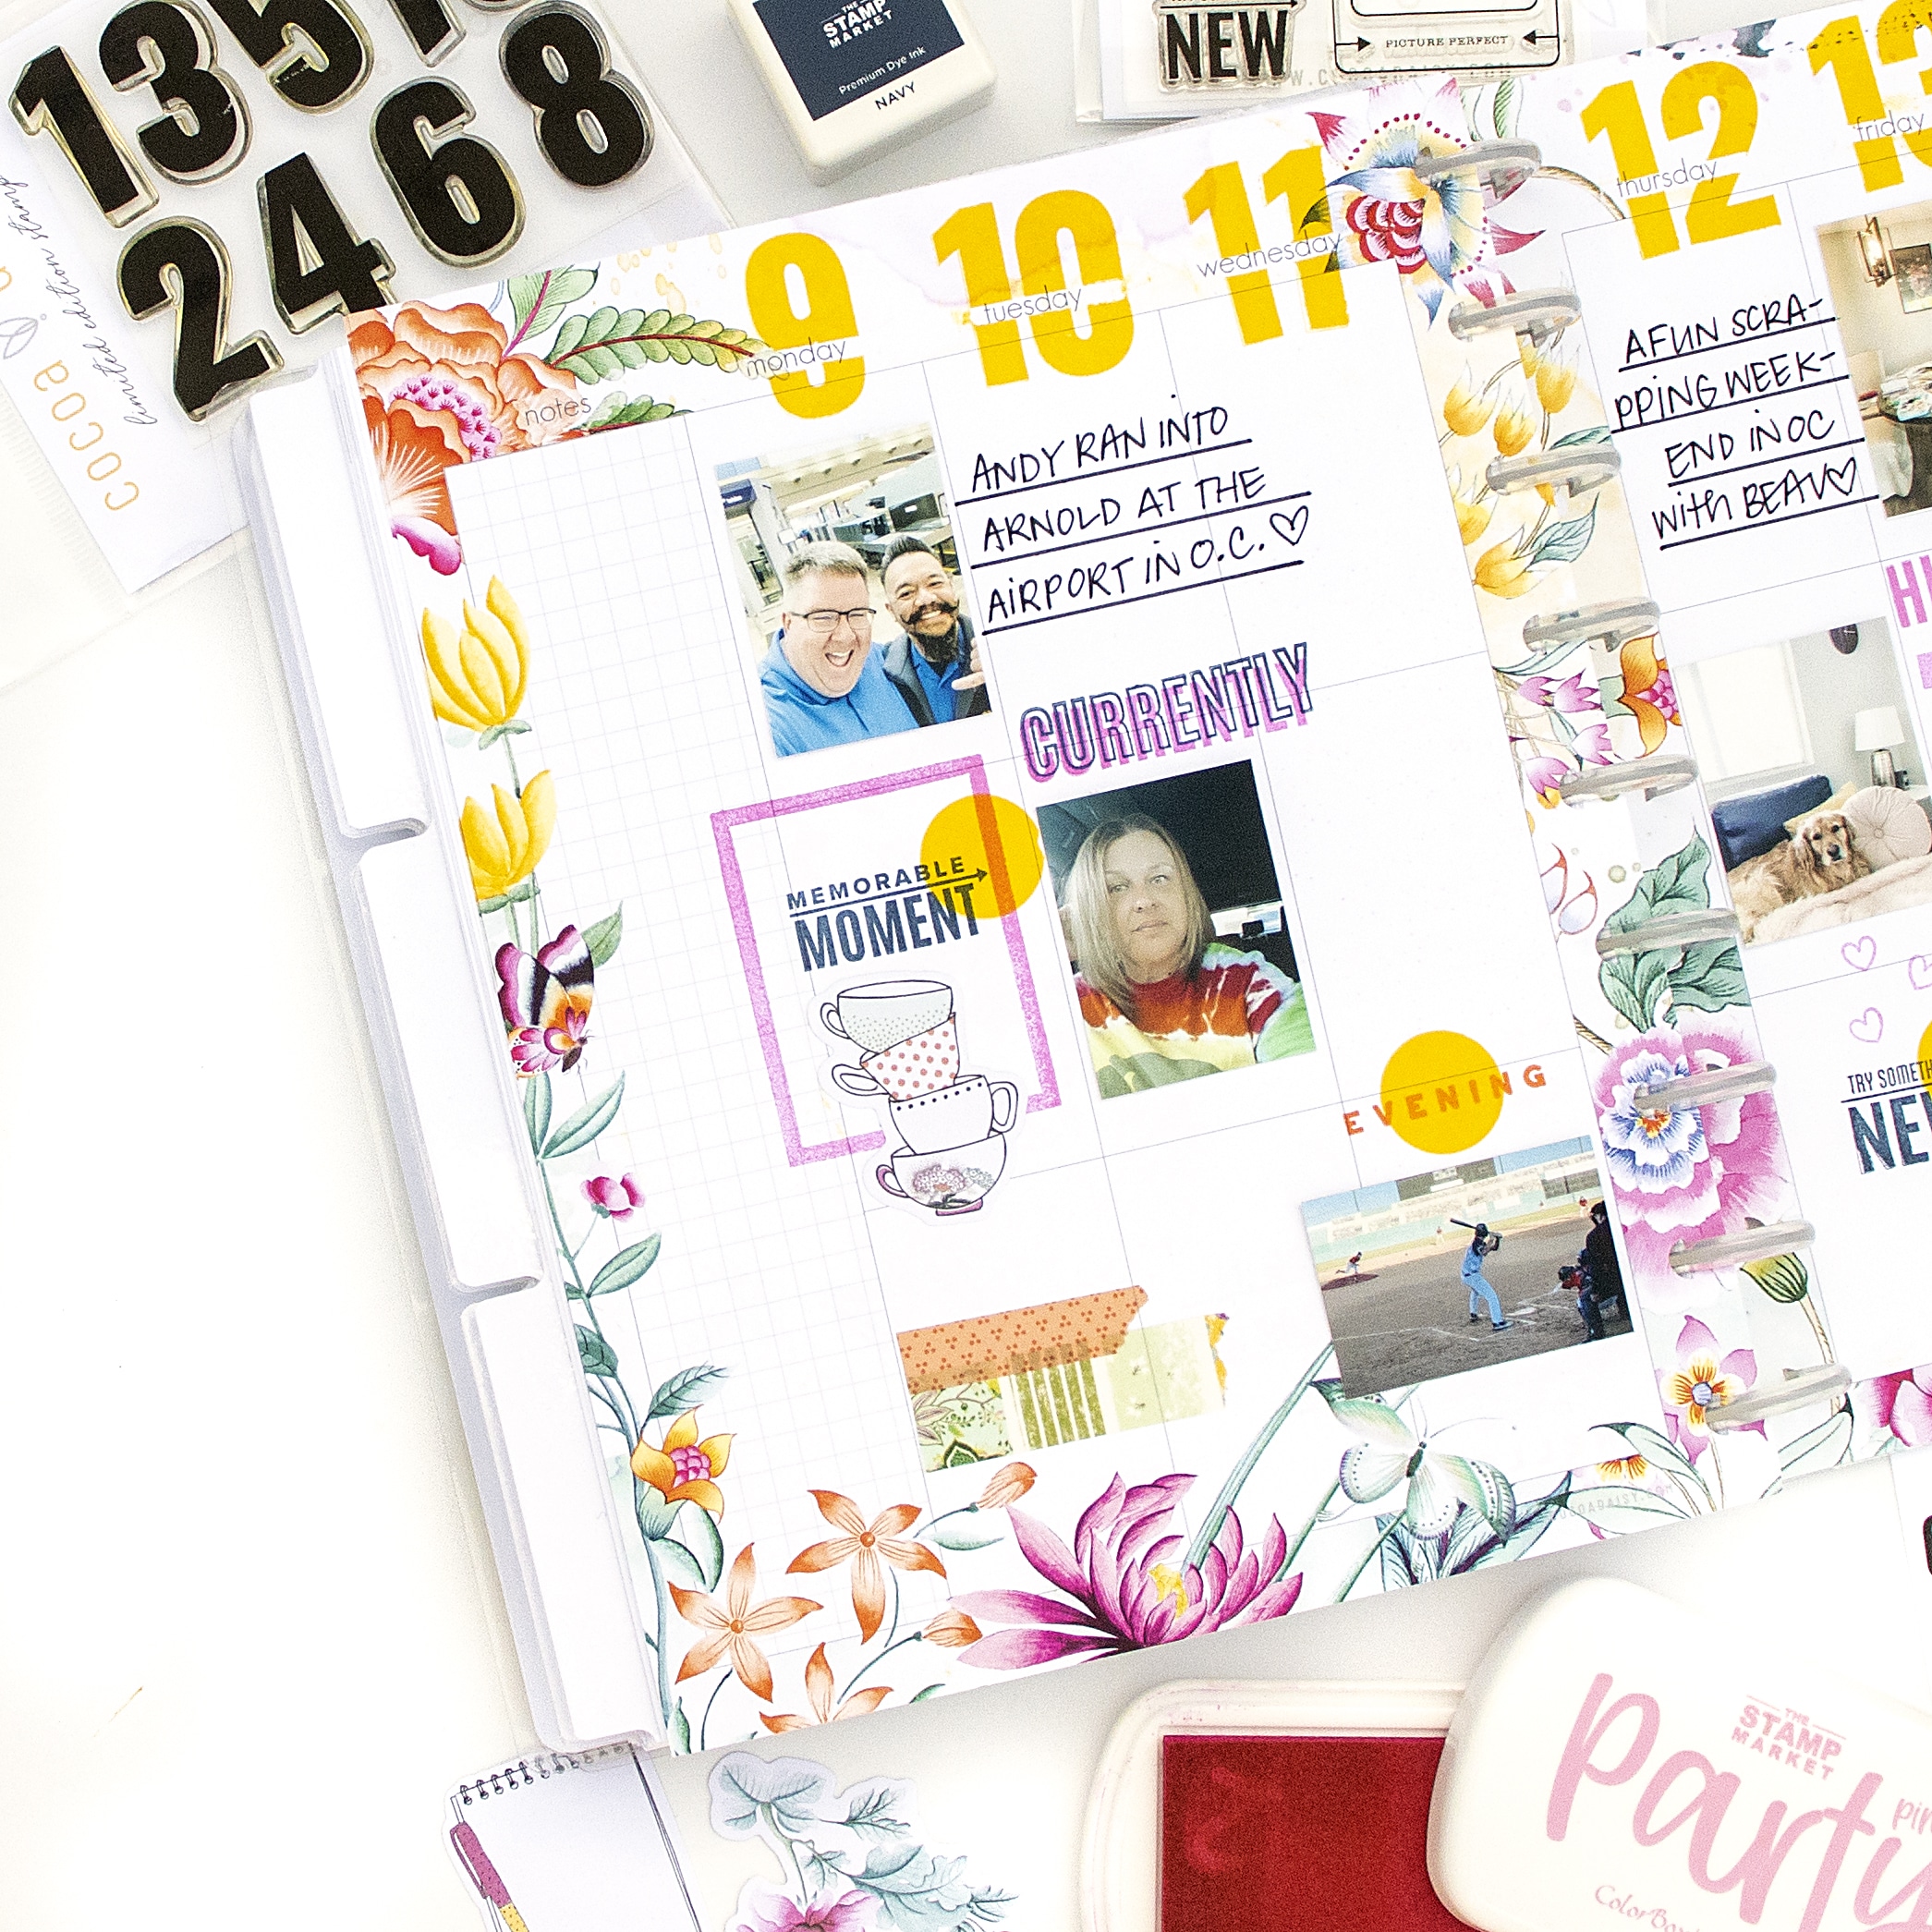
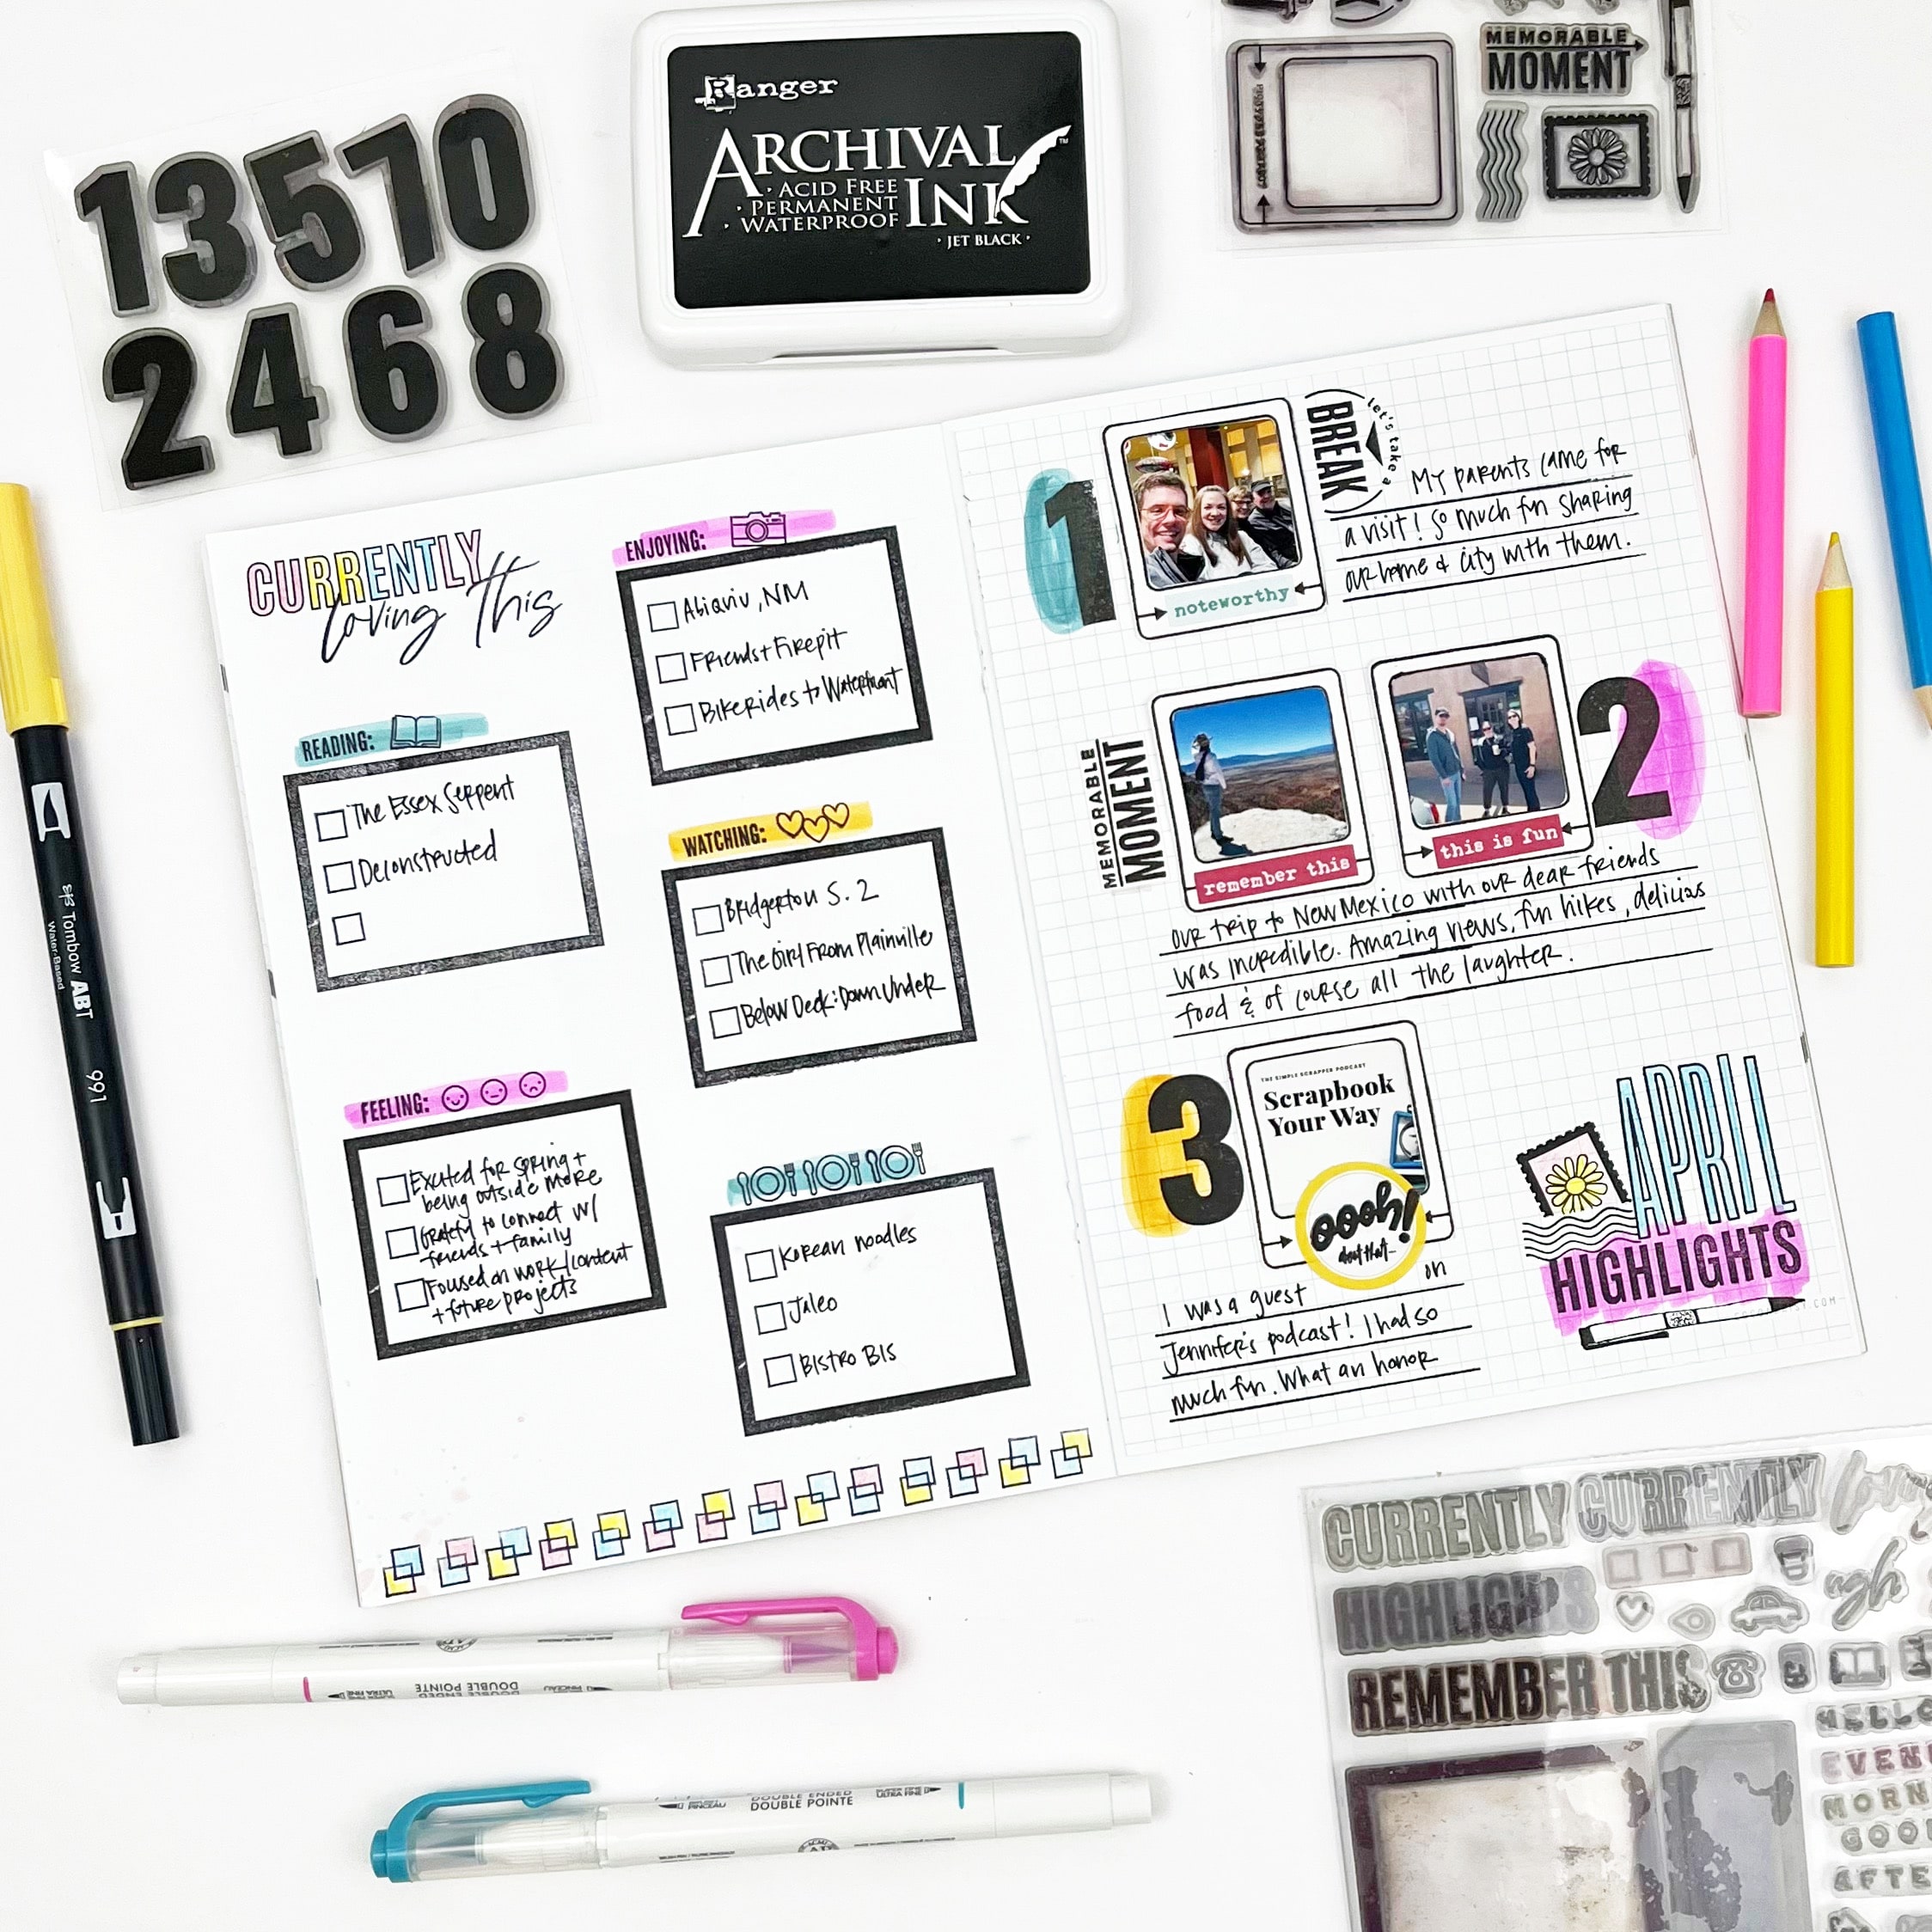
First, I am using the Class Stamp Set to create a “Currently Page”.
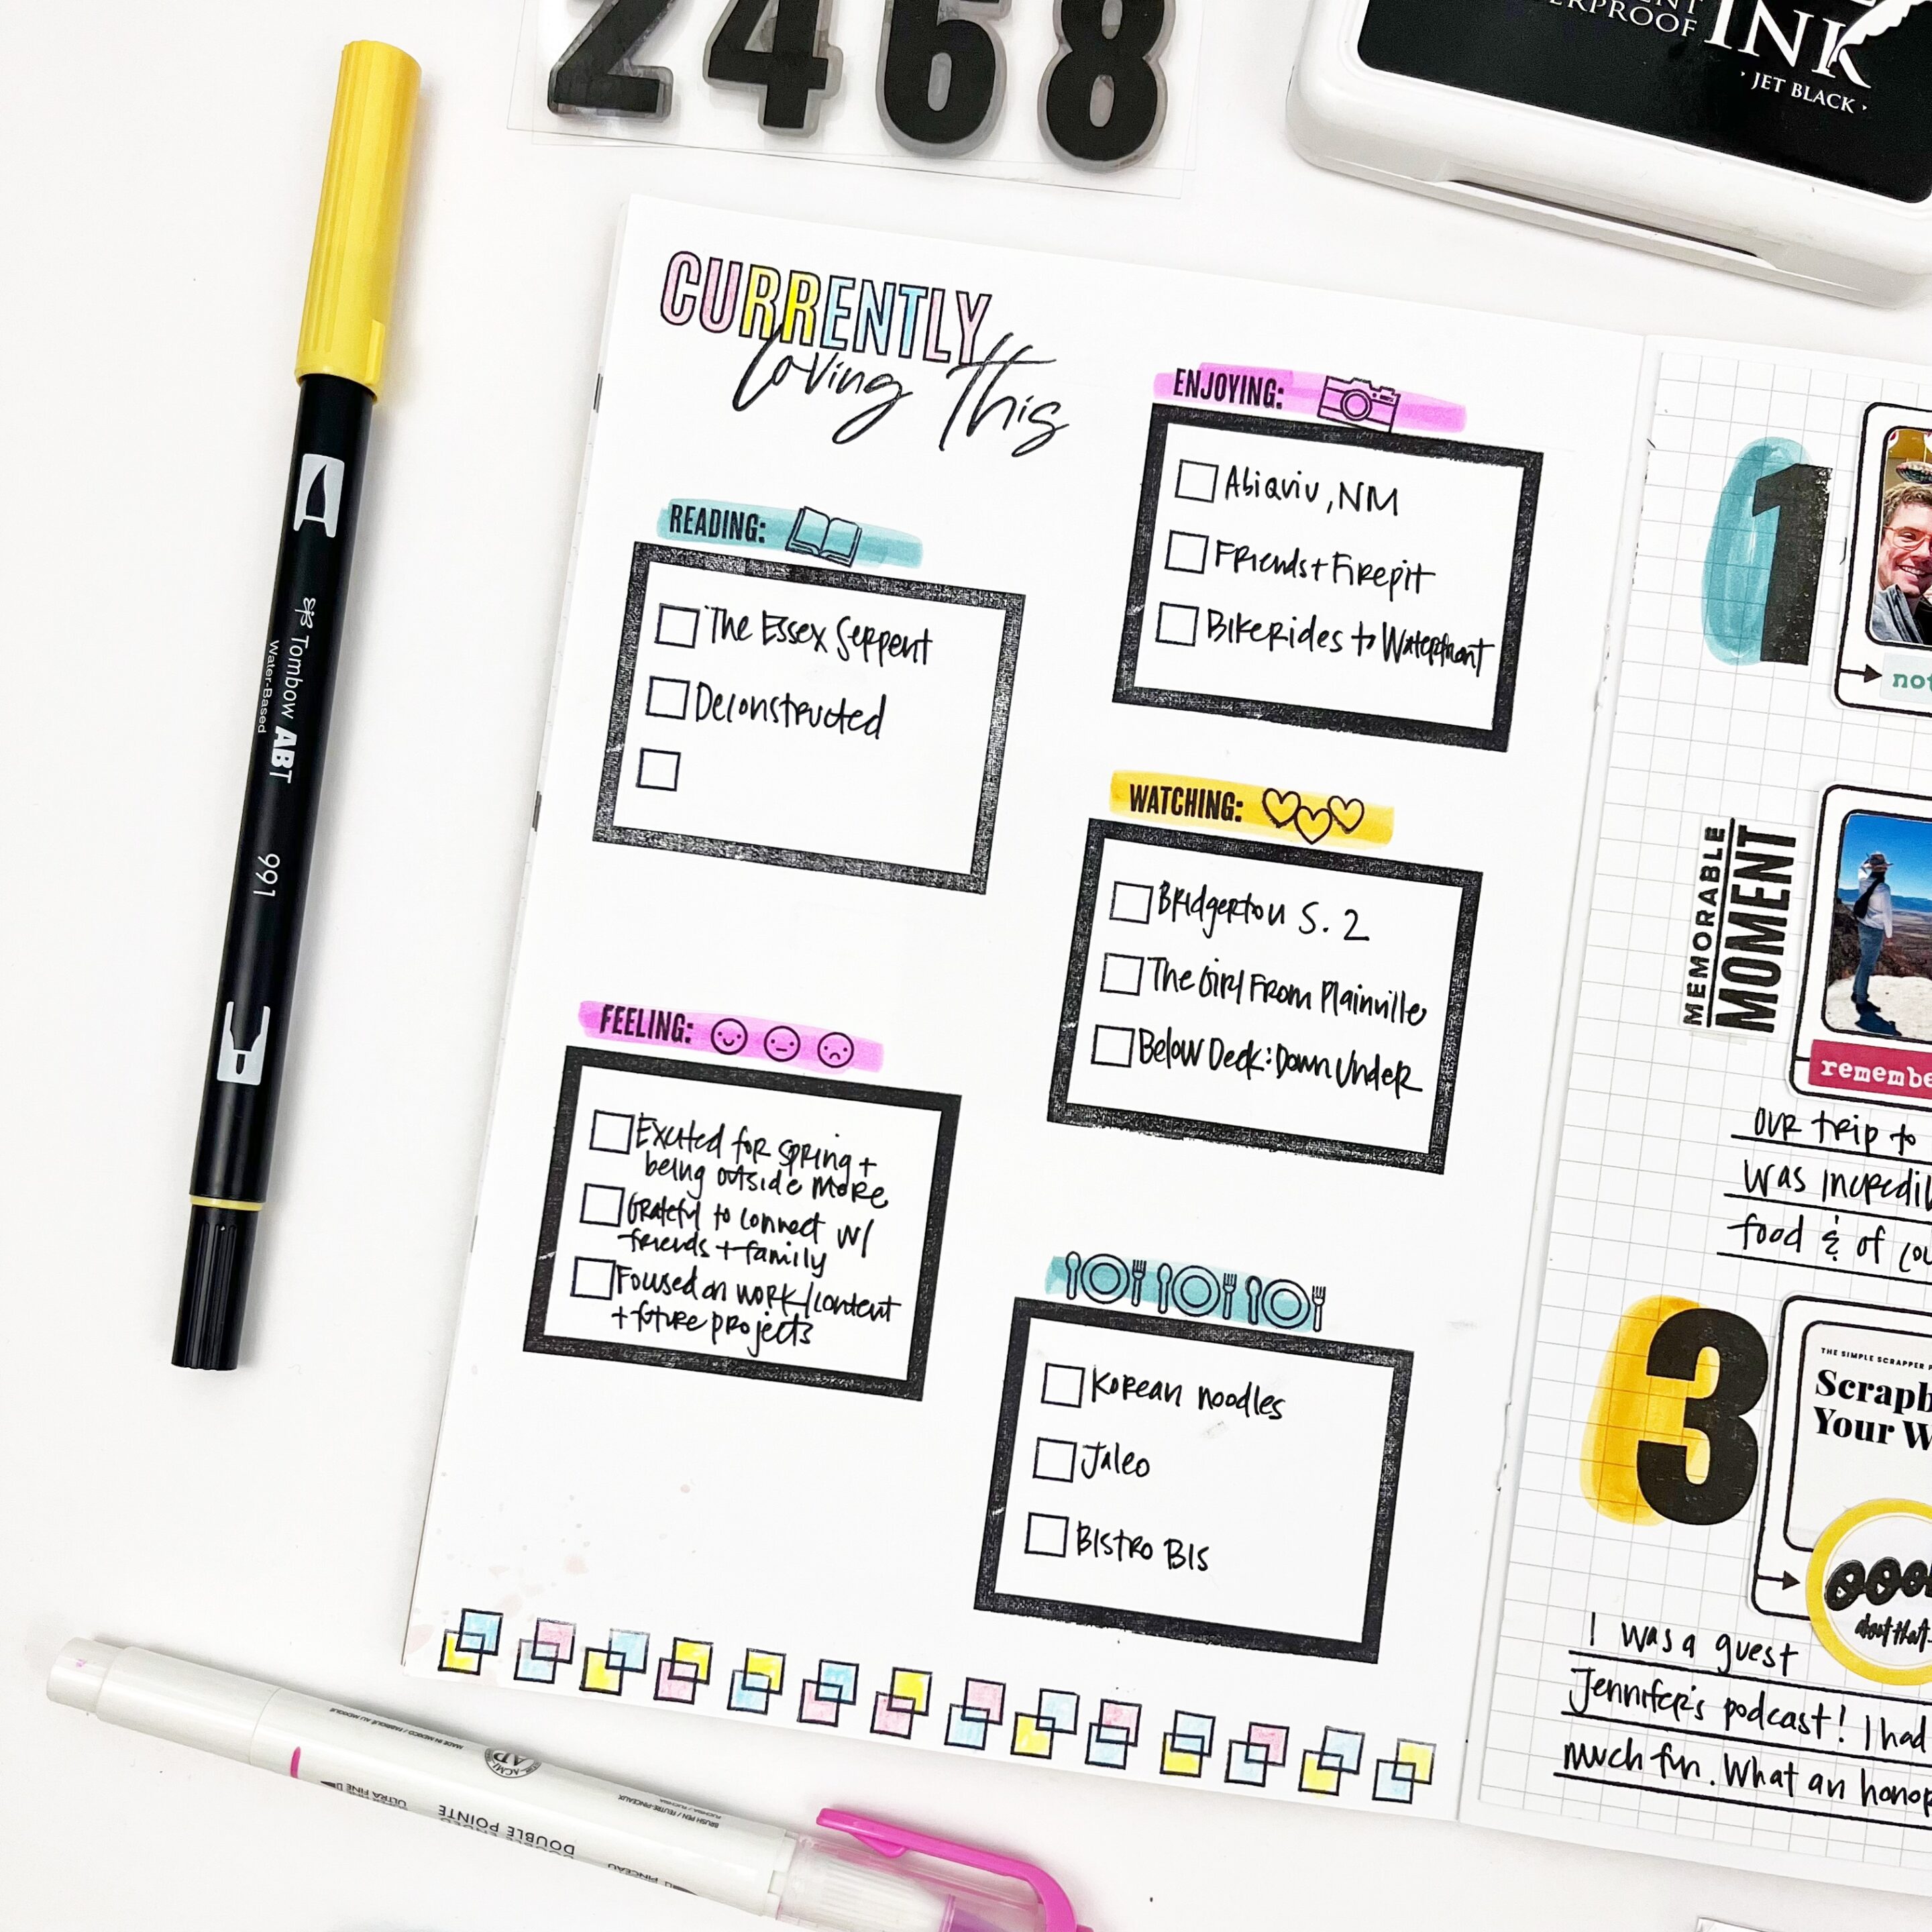
The possibilities are endless for these middle pages in the Daisy Dori inserts, however, that can be confusing to know what purpose they should serve. Having a specific plan for these pages ensures that you can utilize the whole insert, including planning and memory-keeping. As I mentioned in the Introduction, you could use the Daisy Dori for two months of memory planning and use the middle pages for documenting the end of the month with a “currently” page and monthly highlights. This page came together with just one ink (black arrival ink) two stamp sets, and three highlighters/brush pens. If you are new to stamping, don’t worry about having all the ink colors. The black ink can go a long way and is very forgiving.
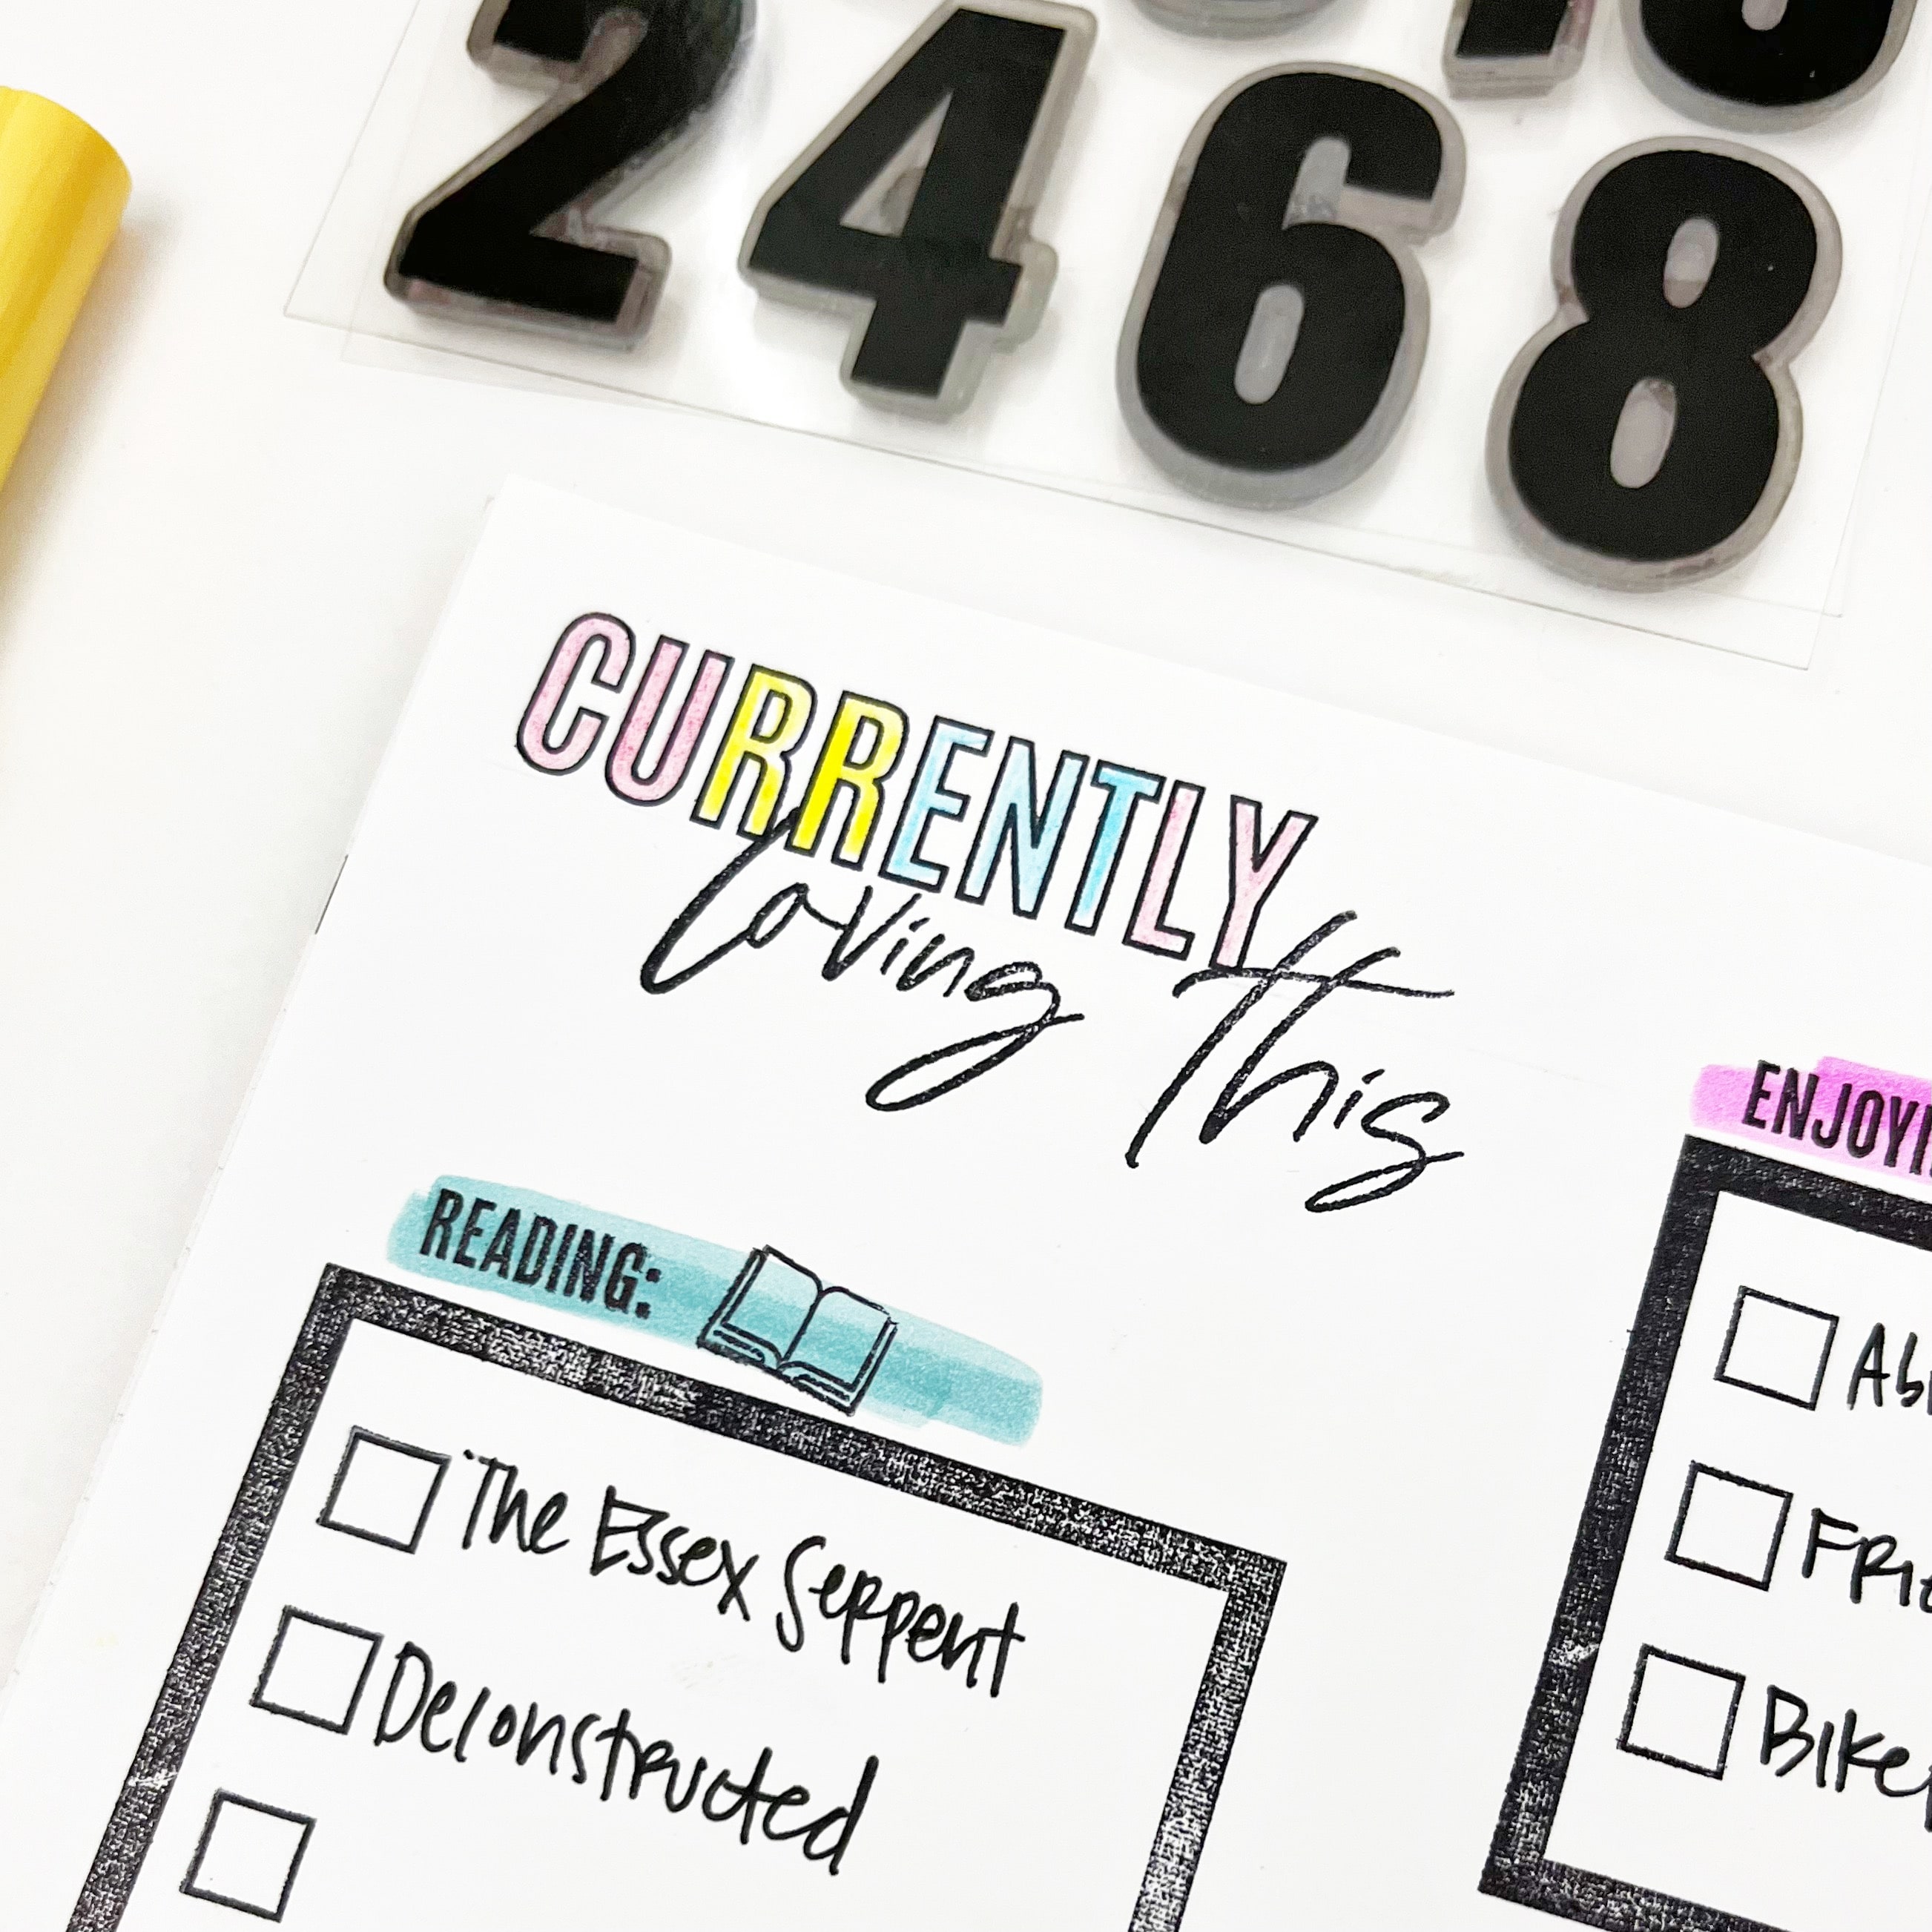
To add color, I used a few swipes with the highlighters, and colored pencils from the Confetti Wishes Classified: Memory Keeping Kit. Stamping allows you to repeat the same format each month and never worry about running out of any supplies to complete the page.
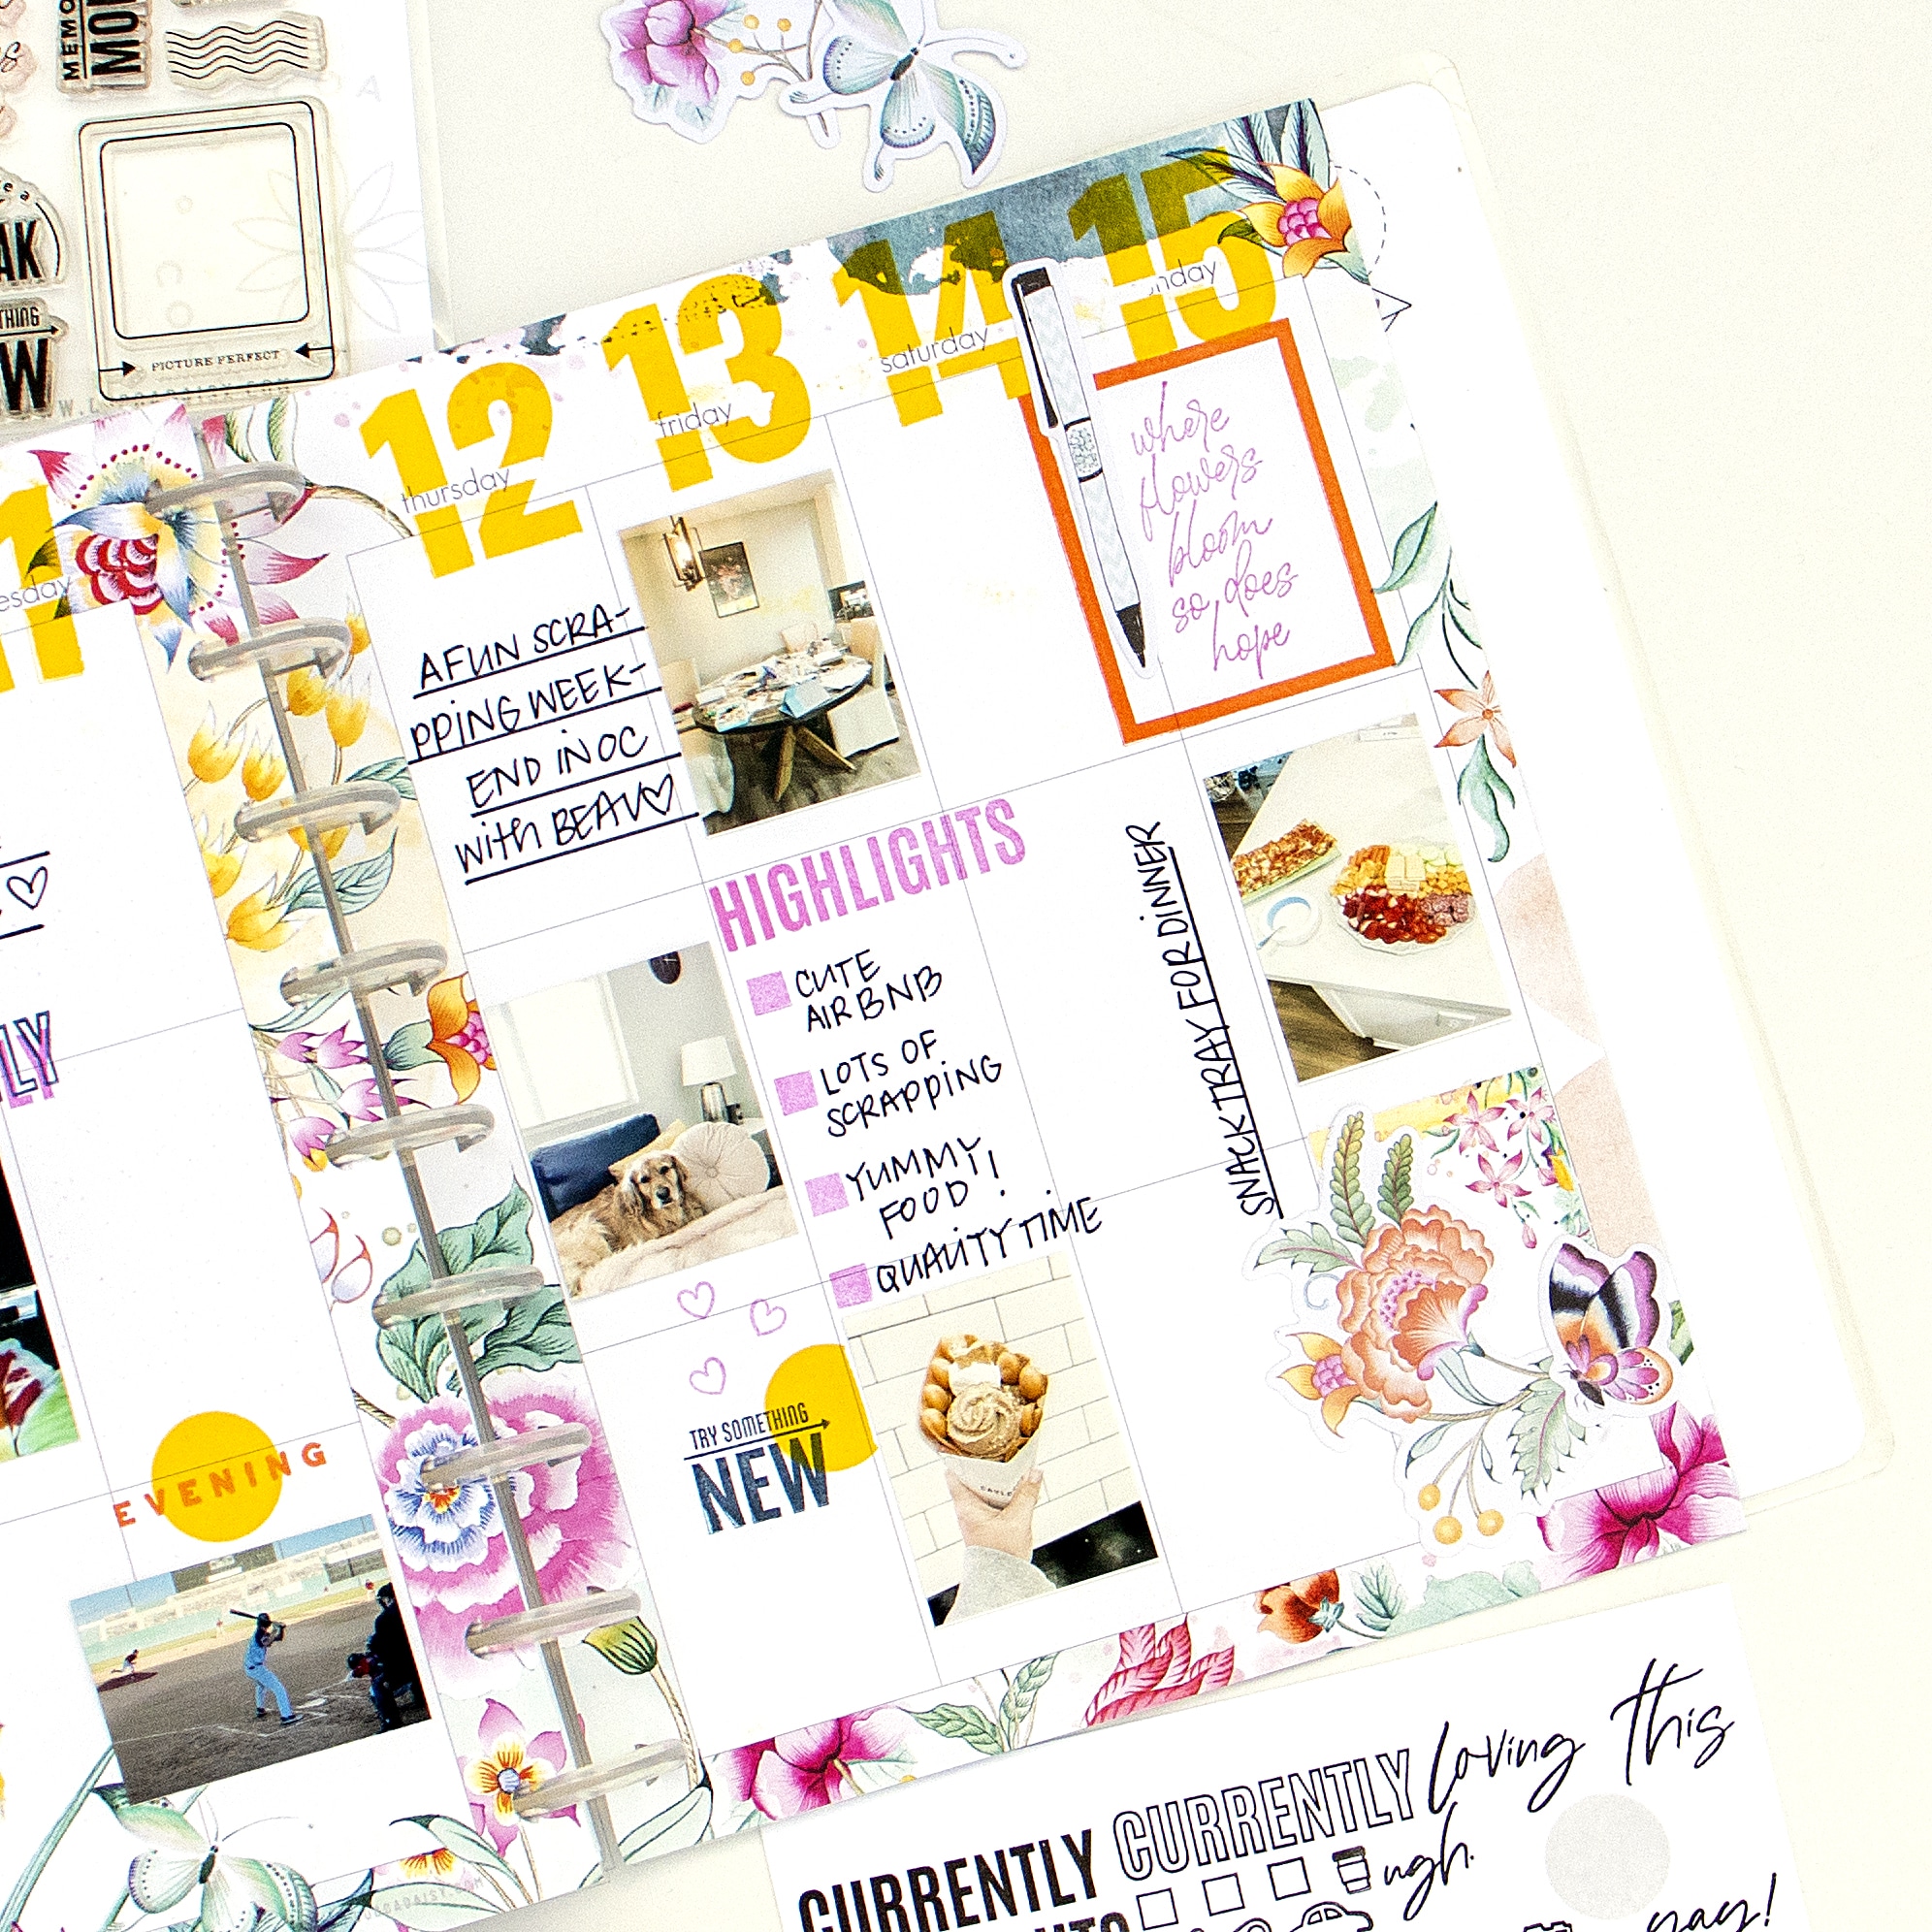
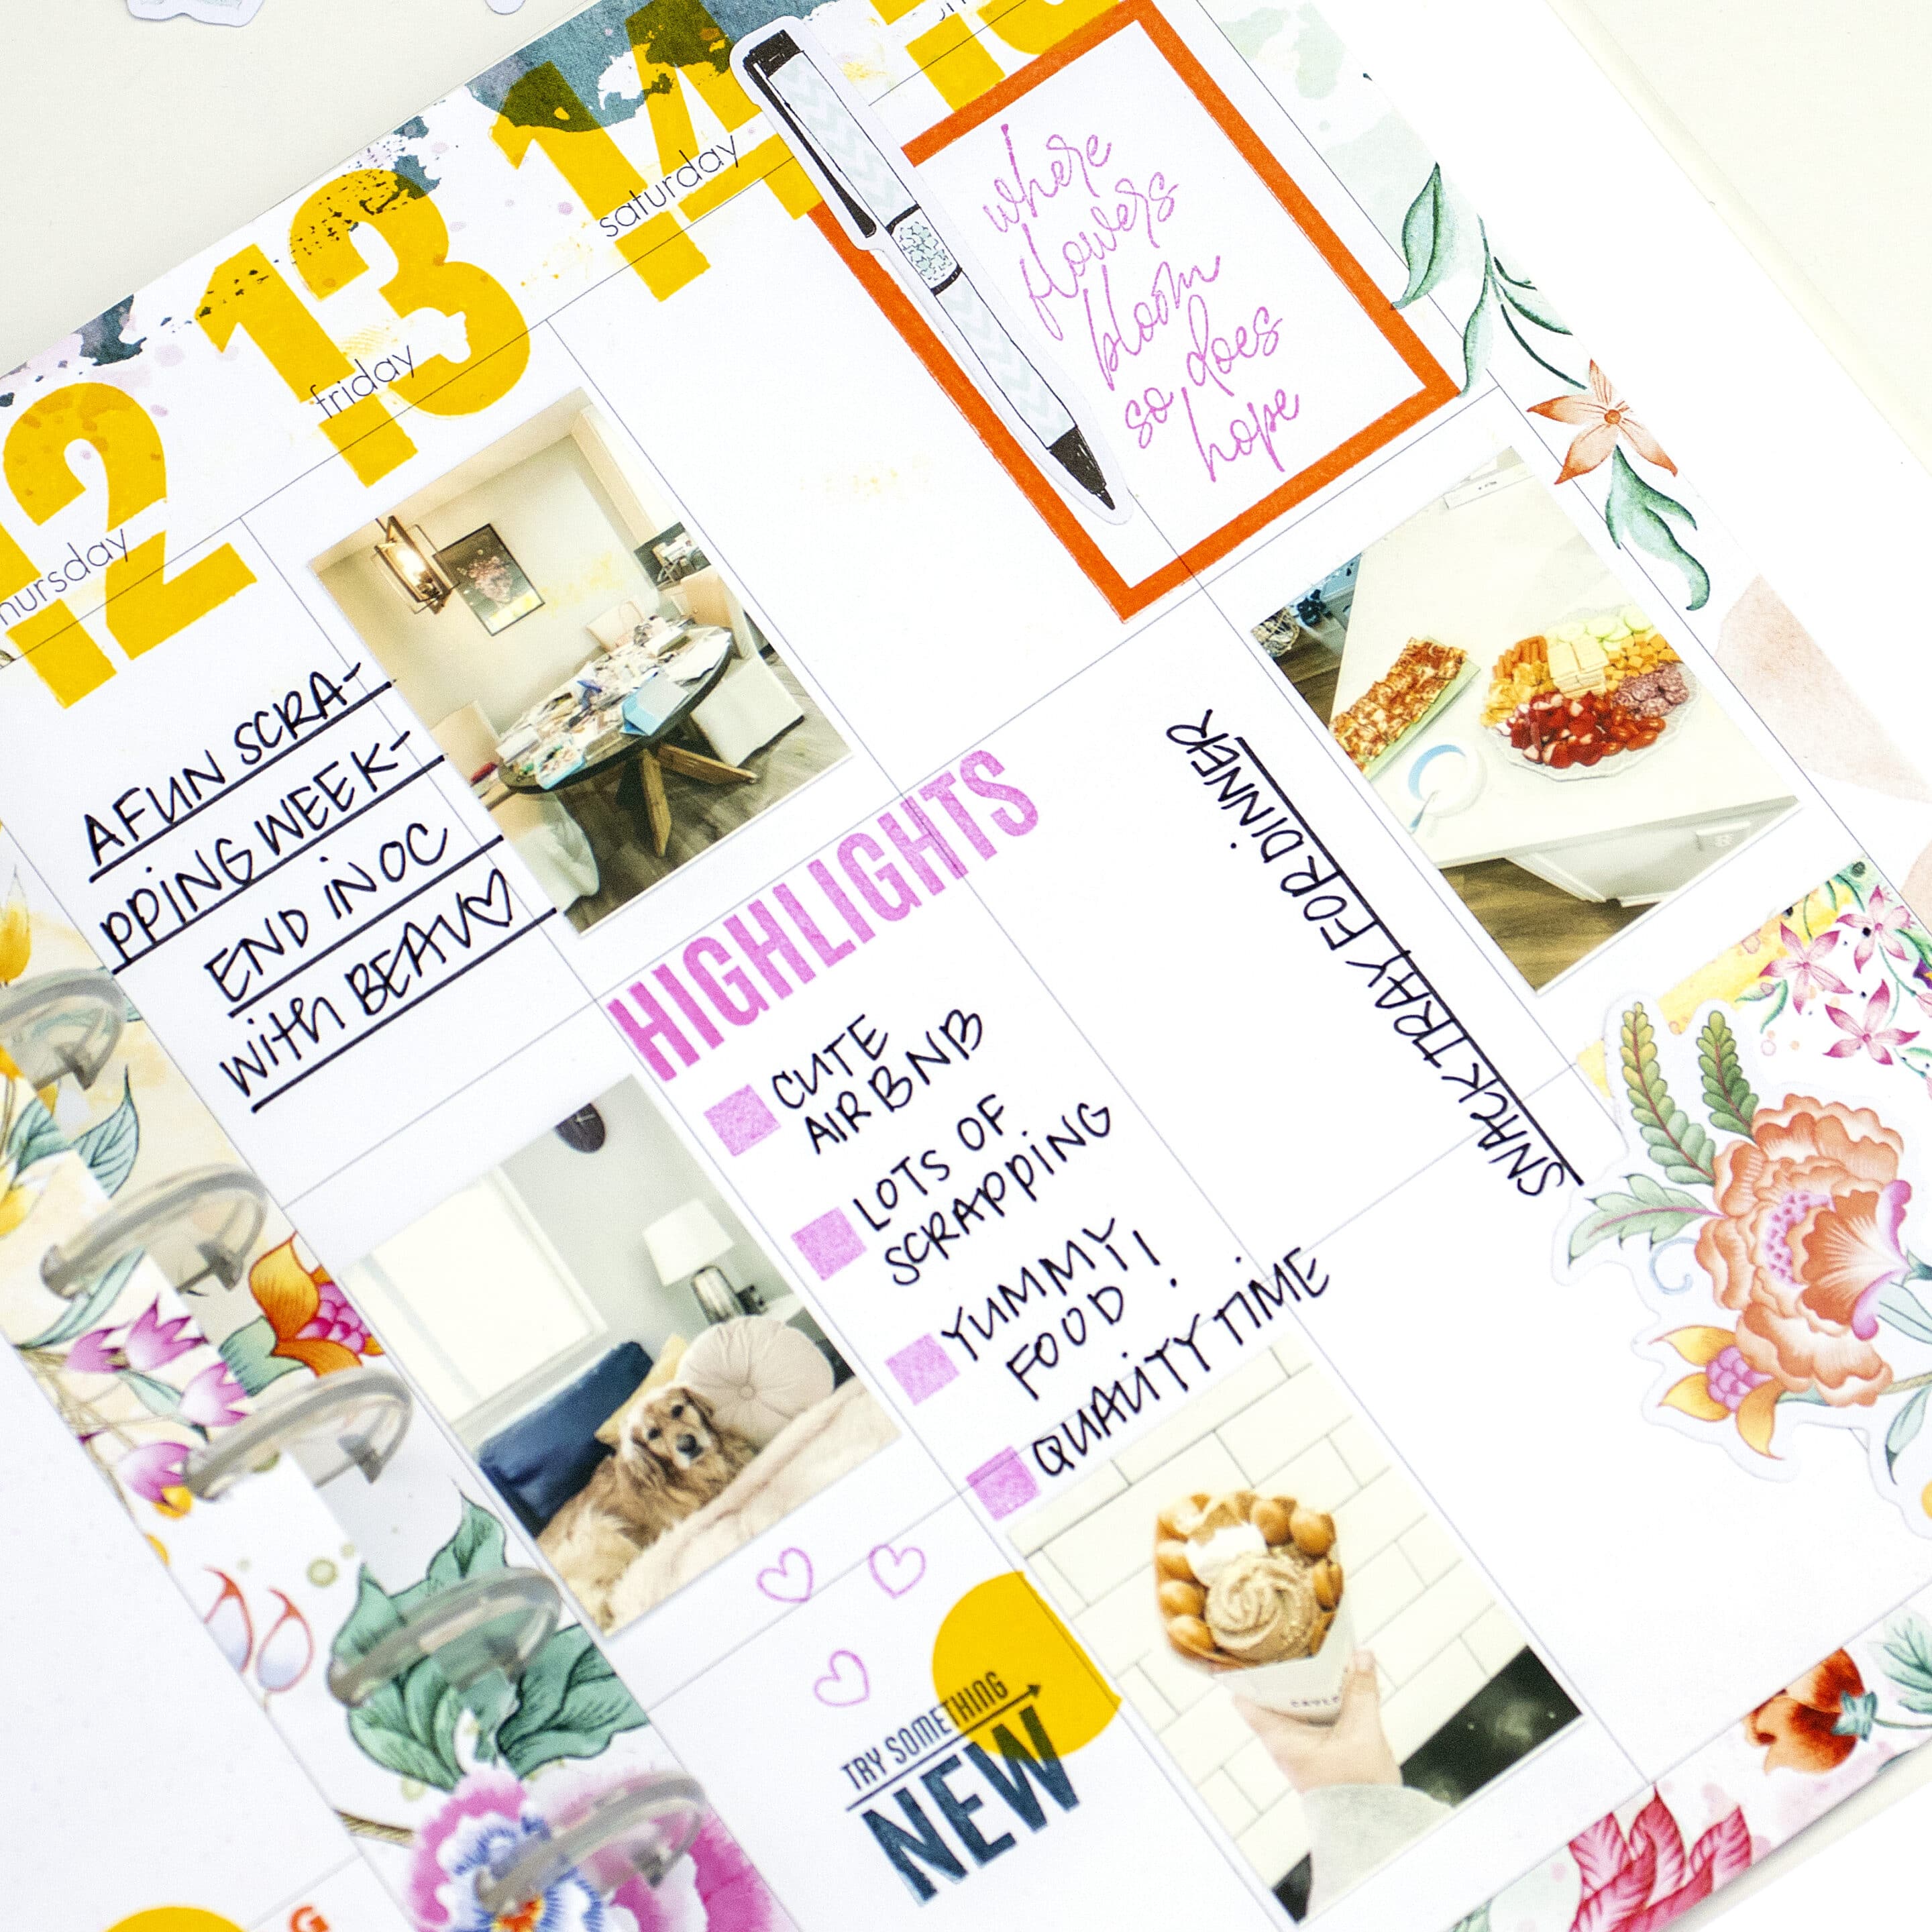
On the other page, I created a “Highlights” page.
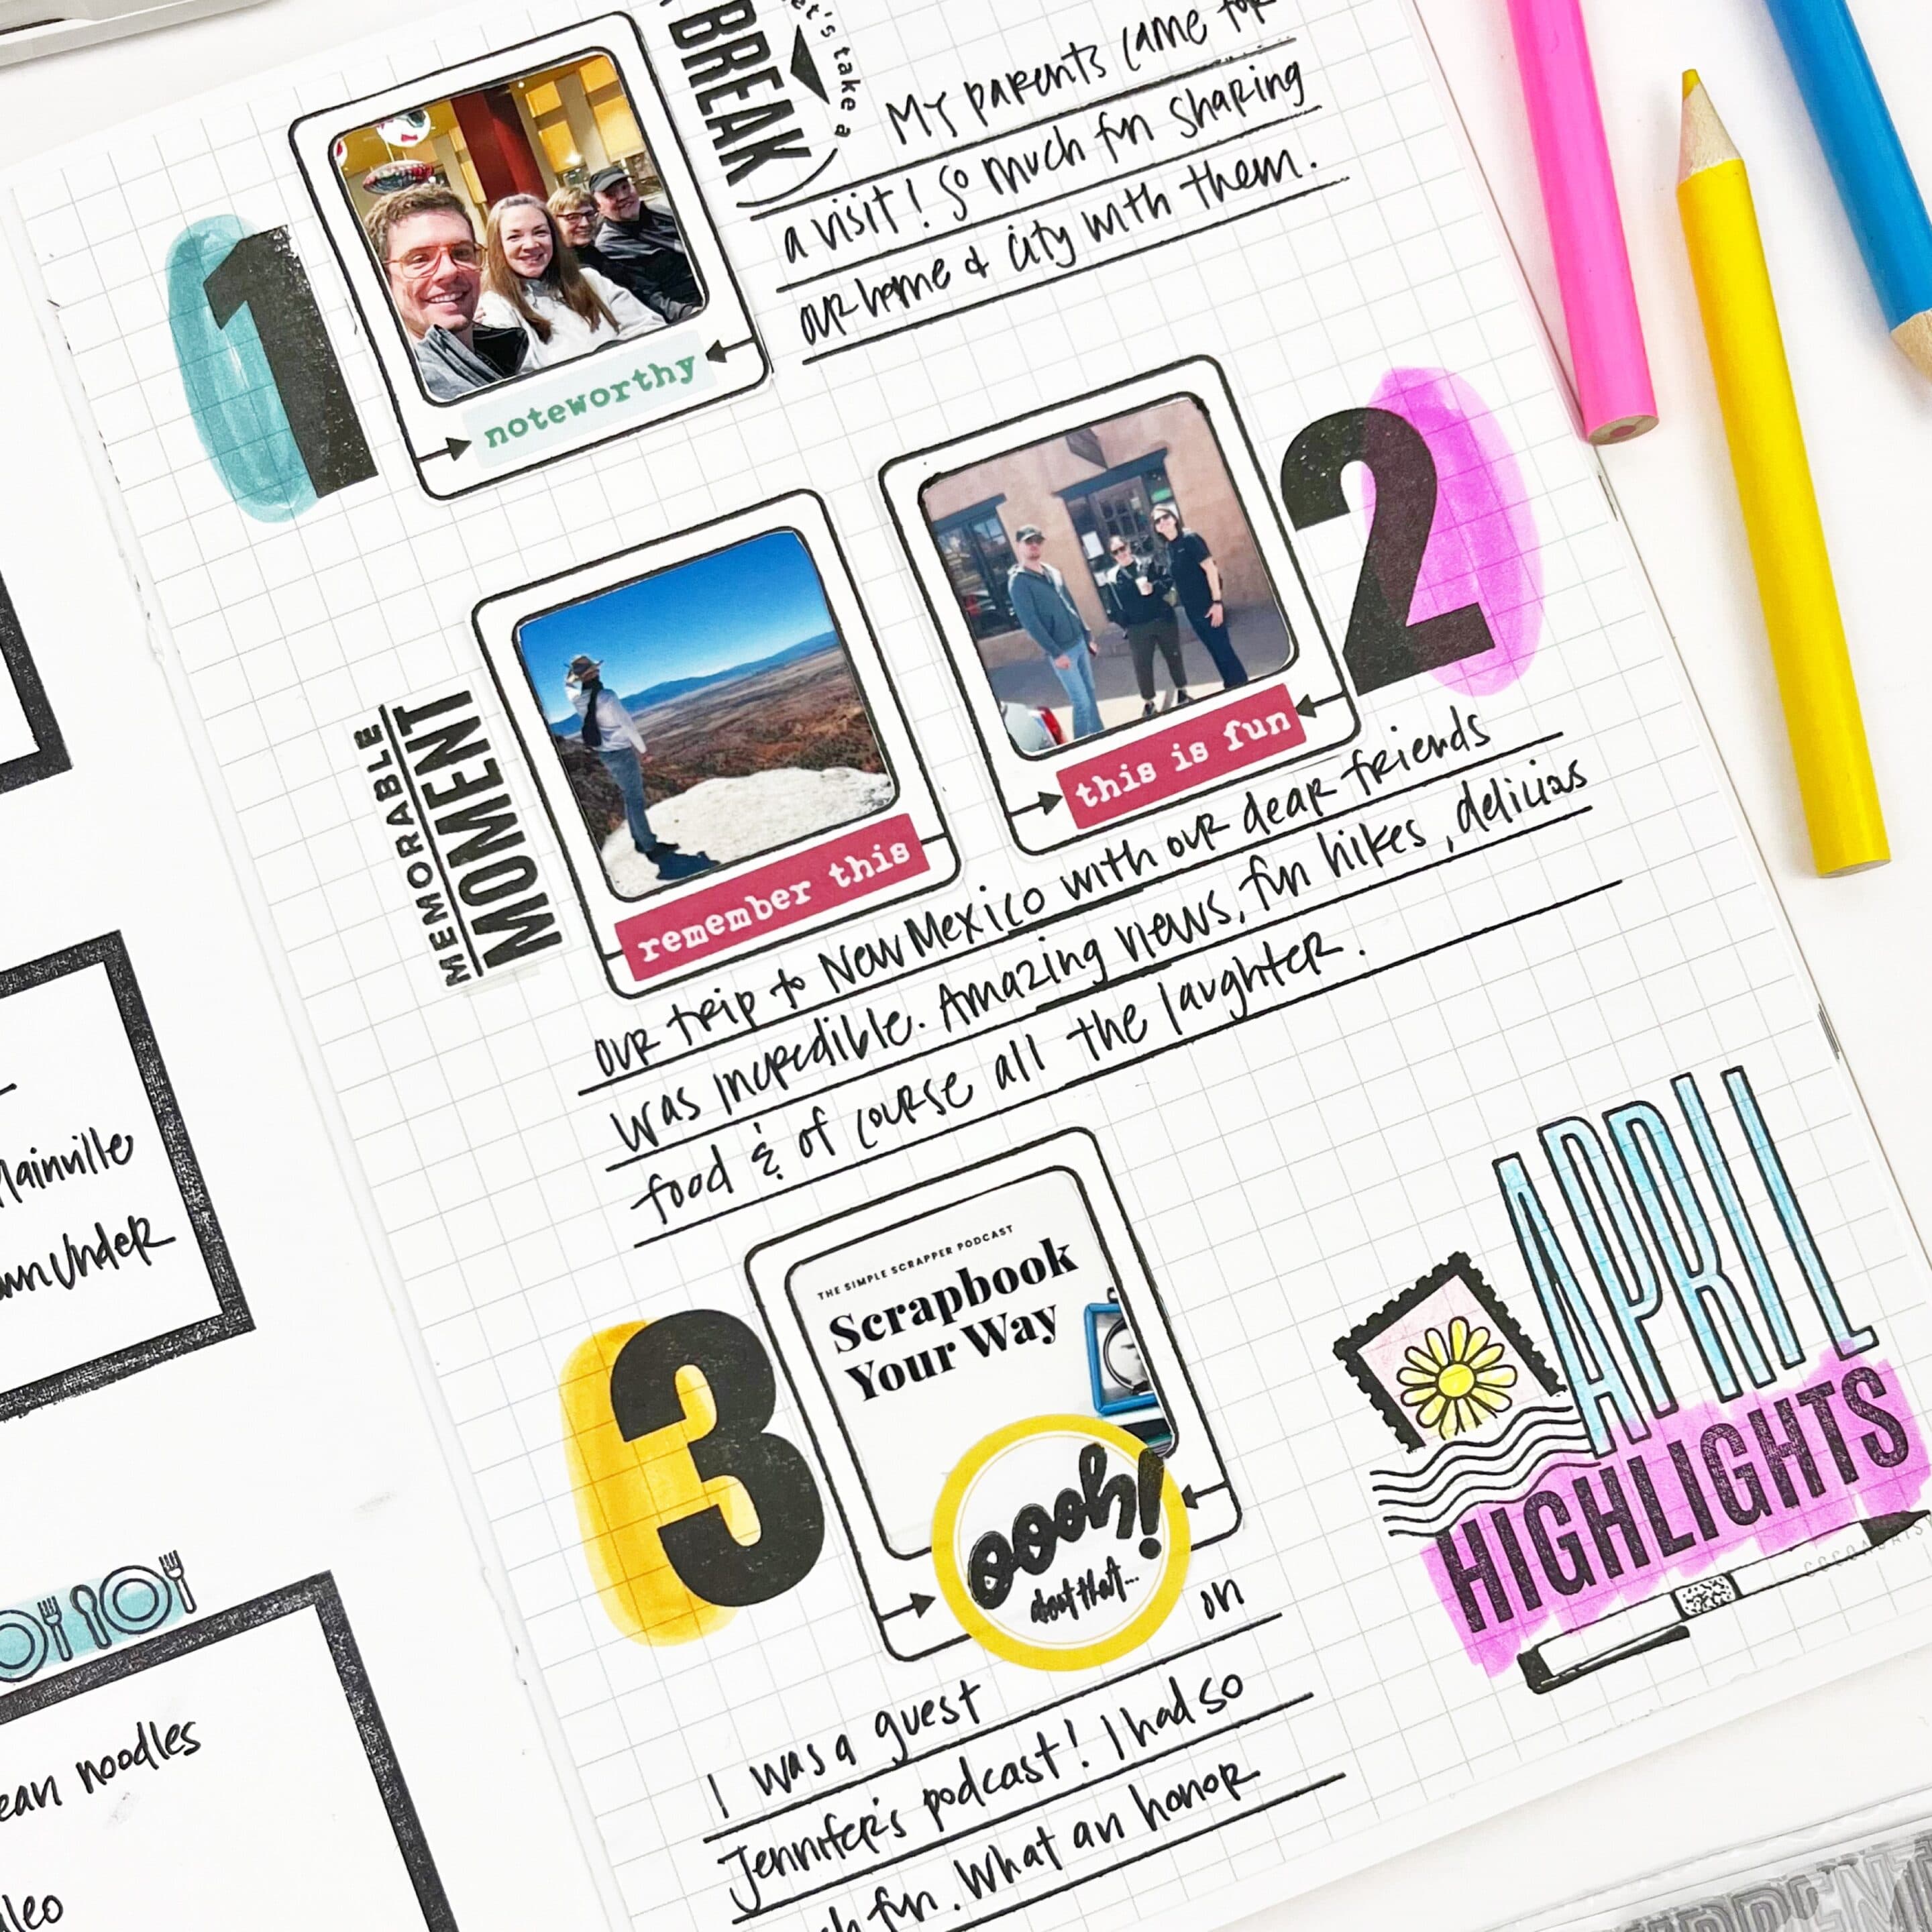
A highlights page is a great way to capture the high points of a month and incorporate them into your regular planner or other memory-keeping formats. When I use a lot of stamping on a page, I like to set myself up for success by choosing a paper that will keep my stamping straight and aligned. For this reason, I grabbed one of the Minimalist A5 Doubled Sided Graph Papers as the foundation of the page.
Stamps can be made into die cuts or stickers very easily! I loved the picture frame stamp from the Afternoon Tea Memory Keeping Stamp Sets and wanted to use it as such for my photos. To give the impression of an actual frame, I trimmed out the middle of the stamp and cropped my photos to the size of the stamp. To change up the sentiment on the frames, I included stickers directly on the frame that matched the feeling in the photos.
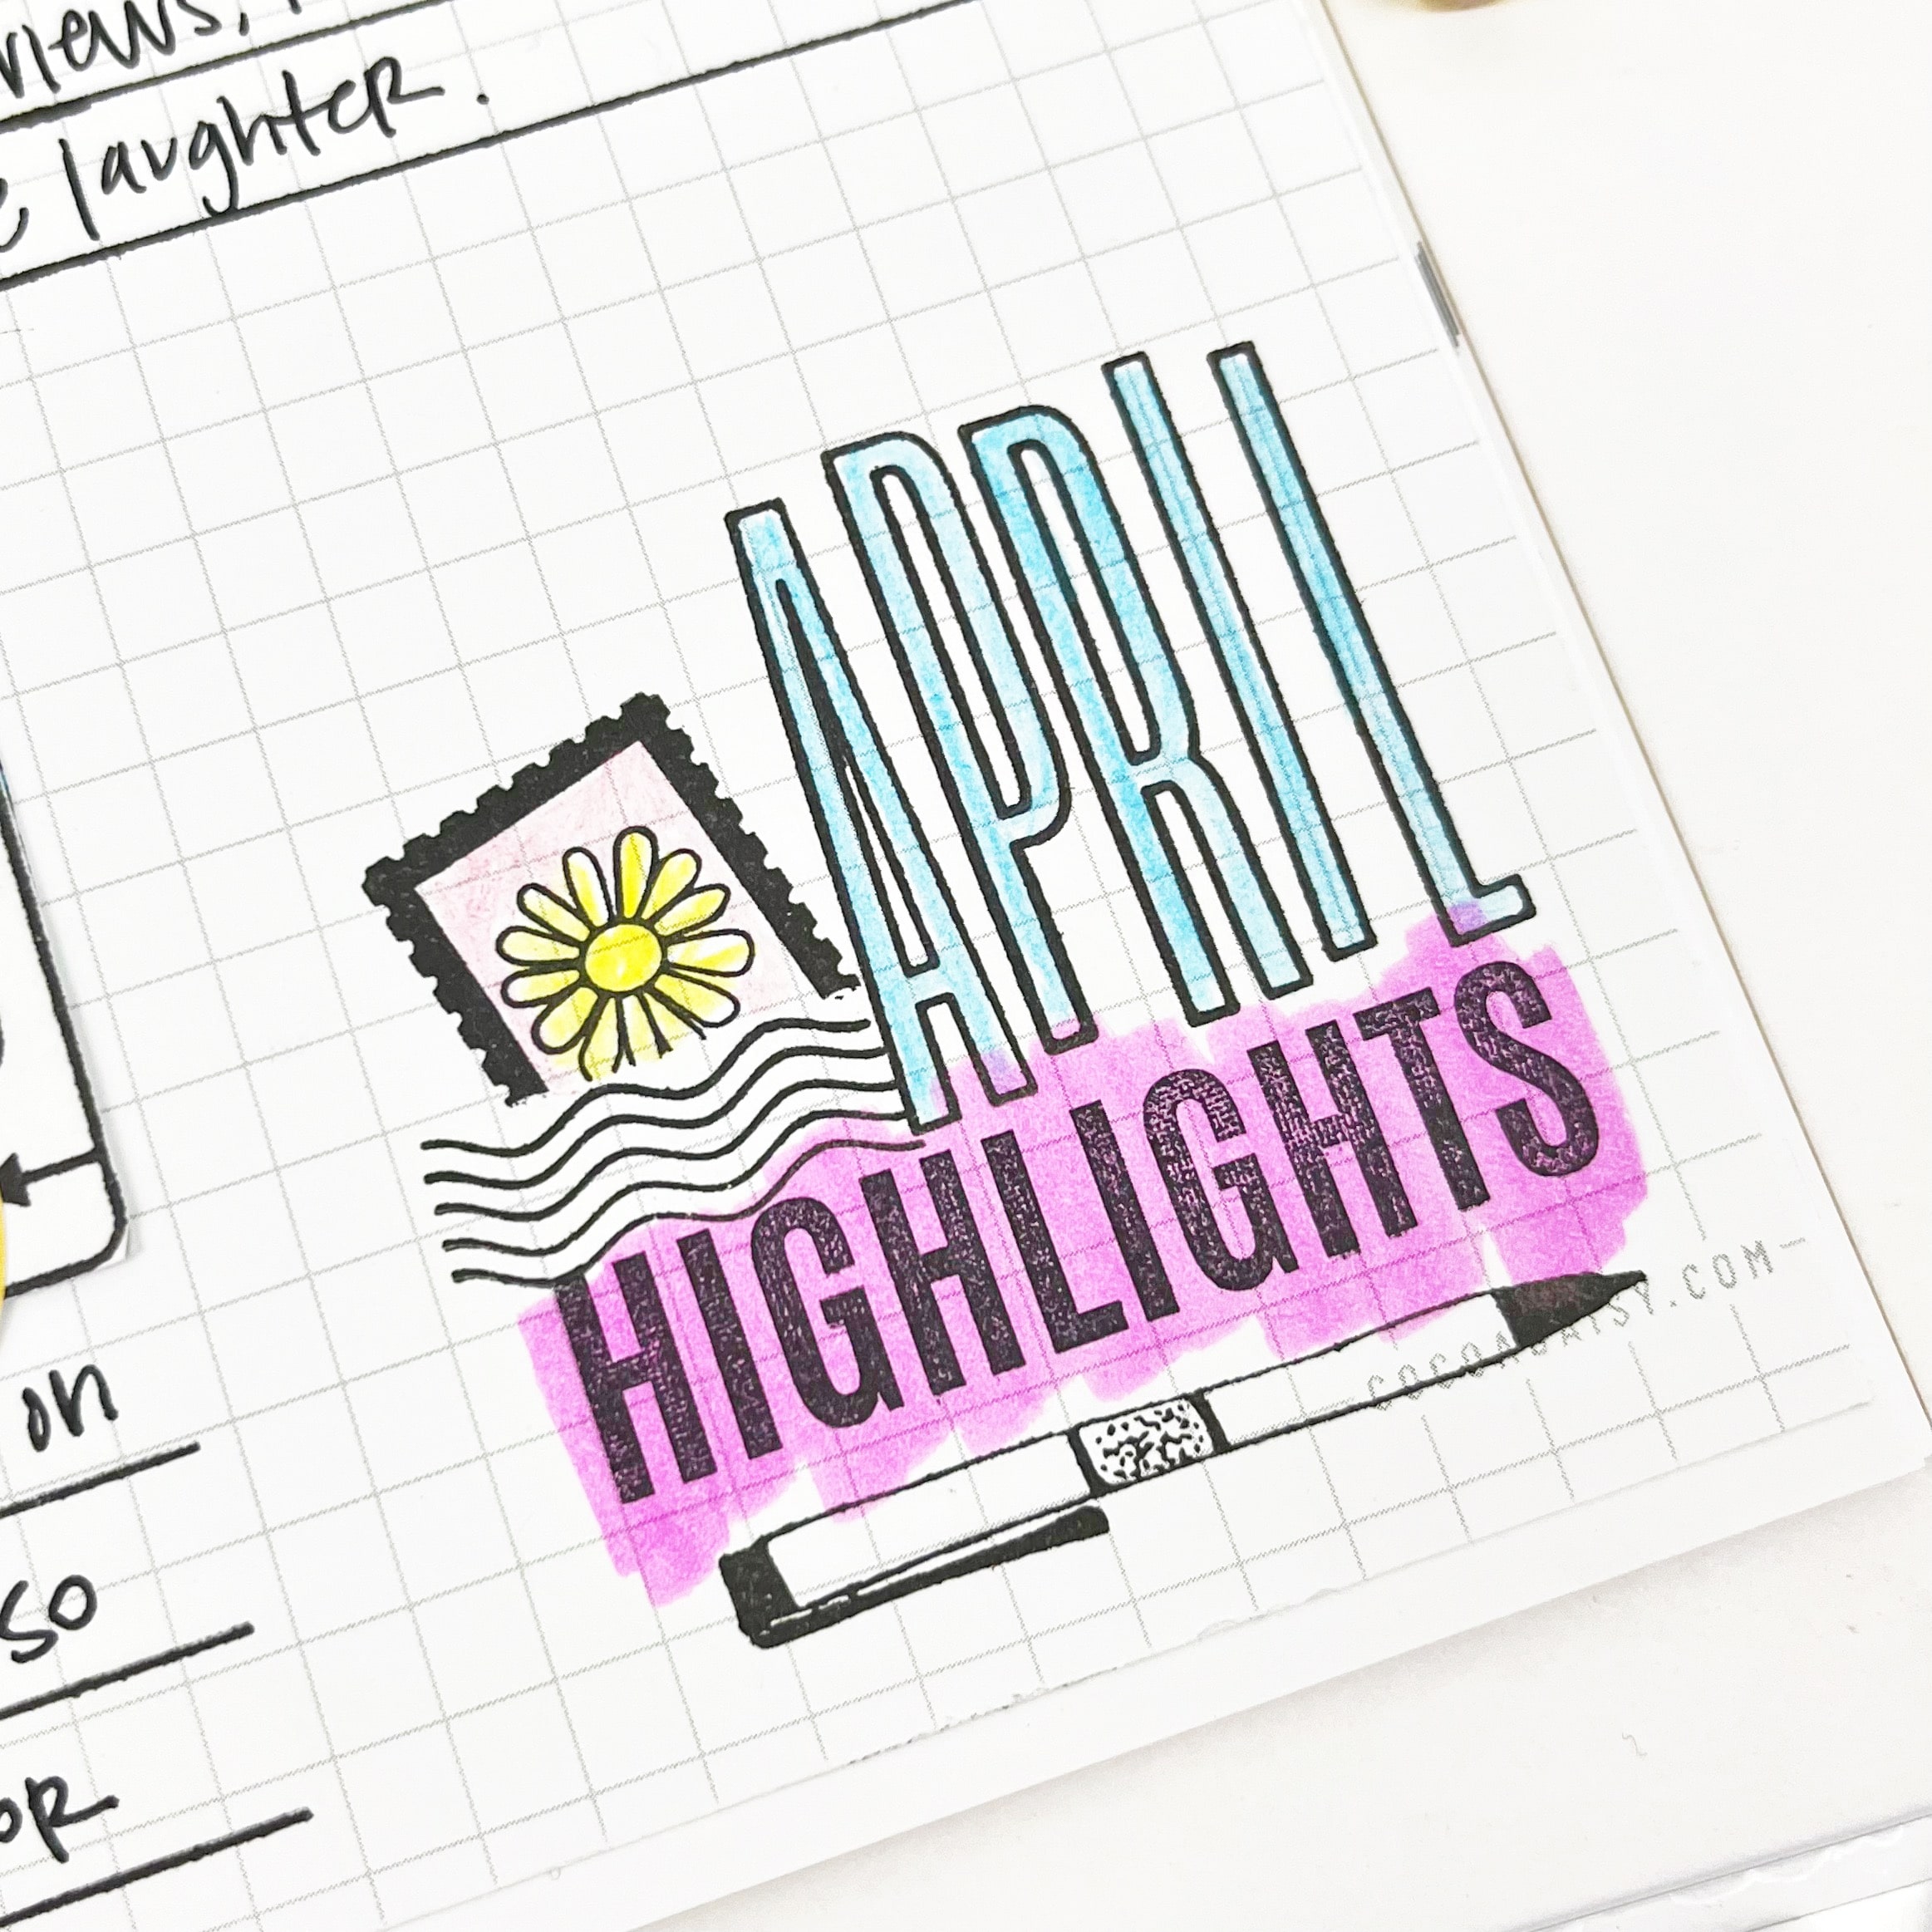
Stamps are great for titles, too! Here, I started with a swipe of color with the highlighter and the “highlights” stamp. To right-align the word “April” I started with the L instead of the A. When making words with alphas stamps, I take the extra step of stamping each alpha individually, to ensure the spacing is right. This time, however, my stamp was a little off, so I went with it, giving the word “April” and bouncy, whimsical feel. Lastly, I used a masking technique to layer the postcard stamp with the swirls. This is accomplished by stamping the swirl first, placing a sticky note (for easy removal) over the stamped portion, and stamping the postcard stamp.
We hope you learned some new techniques today and that you put these ideas to work in your memory planner! Next week we are getting “scrappy” in our memory planners! So gather up your scrapbook supplies, and we’ll see you in the next lesson!
This was fantastic! Learned a lot. Still don’t quite get how to stop the smudging/bleed-through or getting clean lines if I don’t press as hard. But practice makes perfect, right? I think I need to find less juicy ink pads though.
Hi Megan! Thank you for the comment. Honestly, practice goes a long way toward mastering clean lines and less smudging. And I definitely have mistakes all the time, too. The key to successful stamping are 1) making sure you have as flat a surface as possible 2) a stamp block that is close to the size of the stamp 3) firm even pressure (avoid rocking the stamp) and 4) inks that are meant for planner pages like pigment or chalk inks (avoid dye inks). I love distress oxides, but I only use ones that are lightly in color. For inks that are more saturated, I stamp on sticker paper or cardstock instead of directly in my planner. I hope this helps!